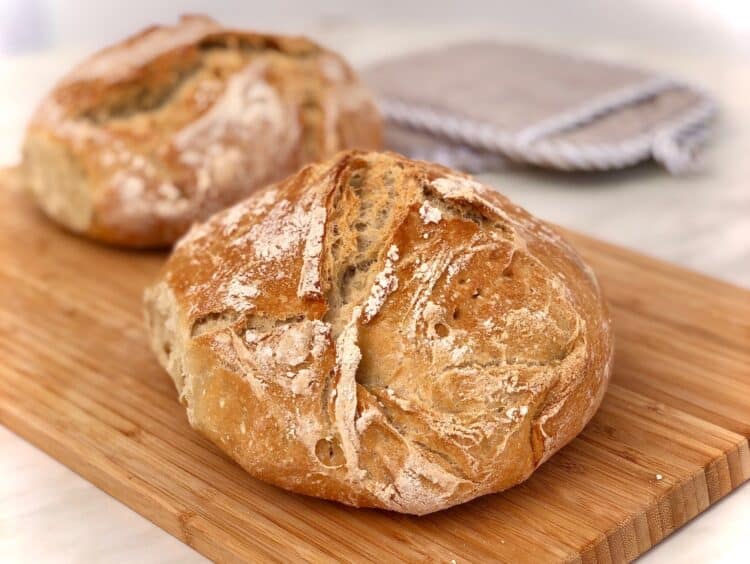
A super easy Greek village bread recipe (Horiatiko Psomi) that will amaze you! This is a Greek rustic bread recipe, that I’m absolutely certain all you bread lovers will enjoy for its simplicity.
For some, making bread is not just a process, but rather something really special. You will love this recipe’s little touches all while waiting patiently for a perfectly proven dough.
And if you’re a novice, I’m sure you’ve tried making bread before and ended up with a mess in your kitchen and nothing but disappointment. Don’t worry though, this super easy Greek bread recipe will never fail you!
Which are the most popular types of Greek breads?
Bread is a staple in the Greek cuisine. One can find lots of different types of breads. The most popular Greek breads are “village” bread (rustic bread), pita bread,raisin bread, Greek sesame bread rings and Lagana. Each one is prepared and shaped in a different way and has each own unique texture and taste.
What is Greek village (country) bread?
Village or country bread (Horiatiko psomi) is a type of Greek bread one can find in every Greek bakery. It originates from Greek villages and has a unique flavor and texture. Traditionally it is a denser type of bread that resembles the taste of sourdough bread. It’s main characteristic is that Greek village bread is baked in outdoors wood fired ovens.
The secrets of a perfectly baked Greek bread – A simple homely version
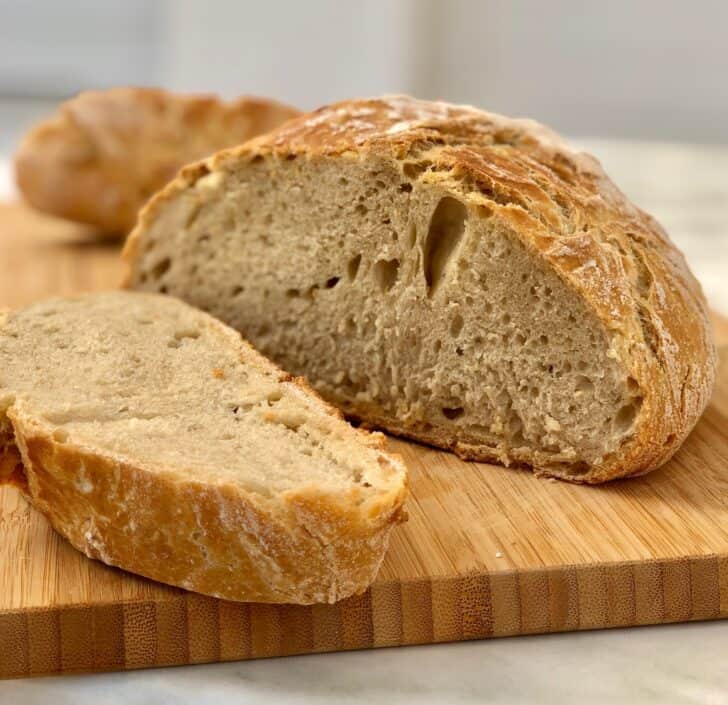
This is an easy simple homely version of the traditional Greek village bread recipe that calls for fresh yeast and a long time proving (overnight). A combination that will give a unique yeast-y taste and texture that resembles sourdough bread.
When preparing this Greek bread recipe it is best to use a “strong” flour known as bread flour which is high in protein. This will help the bread hold it’s shape better and give more texture.
An extra tip is to spread out some semolina on the working surface when kneading the finished dough. Semolina gives homemade bread that extra crisp, that I personally love.
Note: If you don’t have any fresh yeast lying around, you could also use instant yeast (1/3 of the amount of fresh yeast).
How to bake Village bread in an oven?
To bake my Greek bread it’s best to use a casserole dish with a lid or a Dutch oven. Preheat the oven at high temperature (200-210C/ 400F). Bake the bread for 45 minutes with the lid on and another 20 minutes without the lid, until its crusty and golden brown.
This baking technique helps the bread keep its moisture inside. It also helps to form that amazing crust resembling the traditional baking in wood baking ovens.
A super easy Greek village bread recipe (Horiatiko psomi) that will never fail you! All the secrets for a perfectly baked bread; a homely version for all the bread lovers.
To prepare this easy Greek bread recipe, start by adding in a large bowl the water, yeast and sugar. Use a fork to completely dissolve the yeast in the water. Set aside for about 5 -10 minutes to activate the yeast. Note: if you don’t have fresh yeast substitute for dried – just use one third of the quantity stated.
Add half the flour a little bit at time whilst mixing with a spoon. Add the olive oil and salt and the rest of the flour and mix with a spoon until all the flour has been absorbed. At this point the dough should be sticky on your hand.
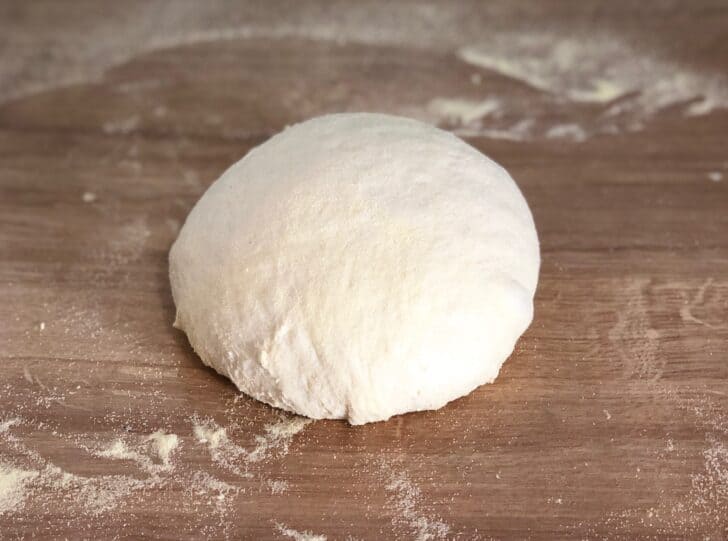
Knead the dough a little bit with your hands until it’s elastic and form into a ball. Place the dough inside a lightly oiled large bowl and cover with cling film.
Let the dough rise at room temperature for 10-12 hours (or overnight).
Deflate the dough. Sprinkle semolina on a large working surface and transfer the dough on the surface. Using a sharp knife divide the dough in 2 equal pieces. (This Greek Bread recipe makes 2 loafs of bread).
Knead each piece of the dough with your hands just enough to have a nice and smooth dough that doesn’t stick too much on your hands (for about 3 minutes). Sprinkle the dough with semolina (2-3 tbsps) when kneading the dough.
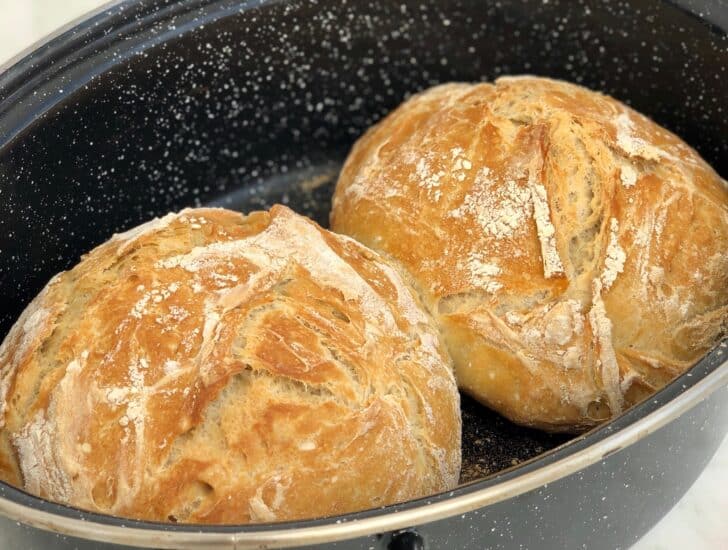
Form 2 round loafs and place inside a casserole dish or clay pot with a lid. Score the top of each loaf using a sharp knife. Place the lid on the casserole dish.
Preheat the oven at 250C/ 480F. Bake for 20 minutes with the lid on and another 15 minutes or so with the lid removed, until nicely coloured and crusty.
When you say loose, do you mean your dough was too wet? In this case, sounds like you need to add more flour. Are you using a kitchen scale to weigh your ingredients? Highly recommend!
How should I interpret that? 🙂 I leaving mine to rise until almost doubled in bulk. Whether that’s correct or not, they turn out great, and people rave about the bread.
If you’re baking 4 loaves instead of 2 then no it wouldn’t need more baking time. If you’re making a larger loaf, it would depend on whether the loaf is larger or simply longer/wider. I would recommend using the same time and taking it out of the oven and tapping underneath. If it sounds hollow its done.
Probably needed a bit longer in the oven and possibly a little bit more kneading in the third step to develop the gluten. Also it may have been the flour – it needs to be bread flour (strong white) 🙂
Ah thank you for spotting this! I’ve updated the times, its about 20 minutes with the lid on and another 15-20 minutes with the lid off but at a higher temperature!
Steps 7 & 8: Could you please answer the question that Allan asked about after the loaves are formed.
Do you let the loaves rise a final time and then put into a preheated oven? Or, put them in the oven without a final full rise?
I’ve made this recipe many times now. I always allow to rise a really long time. The final proof (after shaping the loaf and before the bake is the only proof you need to worry about in terms of not under or over proofing. I usually do about 45-min to one hour for the final proof, which I do in a parchment-lined Dutch oven with lid on. But depending on the heat of your kitchen, you may need less or more time. Use a finger test — when depressing your finger lightly into the dough, does it spring right back? It’s underproofed. Does it leave a deep hole that never fills? Overproofed. You want your dough to be puffy but to still fill your finger indentation back in at least partly. At that stage, sprinkle with more semolina or bread flour, make a couple slashes, replace lid and bake as directed.
Yes absolutely, Turkish villager bread (çoban ekmek) is almost similar to Greek village bread and using the “dough” setting on your machine with instant yeast replaces the need for a 10 hour rest.
I can make a 900 gramme loaf in 2 hours.
Just repeating Sharon’s question description says “Preheat the oven at high temperature (200-210C/ 400F). Bake the bread for 45 minutes with the lid on and another 20 minutes without the lid, until its crusty and golden brown”
Recipe instructions are ” Preheat the oven at 250C/ 480F. Bake for 20 minutes with the lid on and another 15 minutes or so with the lid removed, until nicely coloured and crusty”.
I’m leaning toward 480F oven as I think that temp would create lots of steam quickly to create the great crusts. but a definite answer would be great.
Hi Eve,
In the narrative, you say to bake covered for 45 minutes at 400°F & uncovered for another 20. But on step 8 of the instructions, you say to bake at 480°F (which sounds high) for 20 min with lid on and 15 min with lid off. Which is it? I didn’t notice the discrepancy till I started baking, so I reset the temp to 425 & am keeping an eye on it. I hope it turns out ok.
Your instructions are still confusing. What is the correct baking temp? Is it 480 or 400 F? Bake times? Let it proof a second time after shaping? The dutch ovens you speak of? Do you preheat it in the oven?
Dutch oven should not be preheated in the oven – I line with parchment and let my loaf proof in it one final time before baking.
Final proofing needed after shaping? Yes, always.
The high temp is accurate . You want to create steam quickly. My oven runs very hot so I have to turn down to 450 though, so may need to pay attention to your oven. But basically, follow the baking instructions in the recipe step 8, not the narrative.
Another reason such high temperatures: you are creating a crispy, crunchy crust.
I was so excited to find this recipe and try it! I love the bread from my childhood. My dough was much wetter than described … it’s in the oven now but I don’t have high hopes ☹️ any recommendations? Thank you
Curious, as it says 400′ in the directions in the intro for 1 hour and 5 minutes bake time total. It says, 480′ for 35 minutes total in the recipe. Which is it?
Over the past 8 years you have made My Greek Dish the number one destination for anyone searching for authentic Greek recipes! For that I cannot thank you enough!
It all started with an idea… To collate and publish all those recipes that I loved when I was young, the ones I made with so much love for my children and grand children!
So go ahead, explore my delicious collections and don’t forget to leave me a comment, connect with me on Facebook or Instagram and sign up to my mailing list so you never miss out on my latest creations!

")
")
")
")
")

")

Can you use dry yeast if you can’t find fresh?
It says you can in the recipe!
Have you ever used whole wheat flour for this recipe?
I have! I usually make half the recipe and use 300g white flour and 100g whole wheat or rye. Turns out really well 🙂
Made twice; and both times my dough too loose to form ball of dough.
Can someone convert the measurements to common US metrics; pretty sure I didn’t make a mistake- used an online convention app.😖
When you say loose, do you mean your dough was too wet? In this case, sounds like you need to add more flour. Are you using a kitchen scale to weigh your ingredients? Highly recommend!
What should the diameter of each loaf be? Or the thickness? It just says form 2 round loaves, but for first timers, needs more explanation. Thanks!
Take 8in diameter and divide by 2 and you get 2 4in diameter loaves!
Do you let the loaves rise AFTER shaping them? It sounds like they go directly into the oven from the way the recipe is written.
Bingo!!
How should I interpret that? 🙂 I leaving mine to rise until almost doubled in bulk. Whether that’s correct or not, they turn out great, and people rave about the bread.
Can you use AP flour?
Hi Maria! First choice is bread flour but yes you can use all purpose flour, if you don’t have any bread flour in hand.
Can I leave the dough 24 hours before cooking?
Yes but after its done proofing (step 3) put it in the fridge to stop it proofing any further.
If you double it do you need to bake it longer?
Hi Steve
If you’re baking 4 loaves instead of 2 then no it wouldn’t need more baking time. If you’re making a larger loaf, it would depend on whether the loaf is larger or simply longer/wider. I would recommend using the same time and taking it out of the oven and tapping underneath. If it sounds hollow its done.
I made this the other night! When it came out and was all cooled off it was
too moist, almost like cake instead of bread! What did I do wrong?
Probably needed a bit longer in the oven and possibly a little bit more kneading in the third step to develop the gluten. Also it may have been the flour – it needs to be bread flour (strong white) 🙂
65 minutes for a ~500g loaf of bread seems a long time …?
Hi Allan
Ah thank you for spotting this! I’ve updated the times, its about 20 minutes with the lid on and another 15-20 minutes with the lid off but at a higher temperature!
Steps 7 & 8: Could you please answer the question that Allan asked about after the loaves are formed.
Do you let the loaves rise a final time and then put into a preheated oven? Or, put them in the oven without a final full rise?
Thank you.
I’ve made this recipe many times now. I always allow to rise a really long time. The final proof (after shaping the loaf and before the bake is the only proof you need to worry about in terms of not under or over proofing. I usually do about 45-min to one hour for the final proof, which I do in a parchment-lined Dutch oven with lid on. But depending on the heat of your kitchen, you may need less or more time. Use a finger test — when depressing your finger lightly into the dough, does it spring right back? It’s underproofed. Does it leave a deep hole that never fills? Overproofed. You want your dough to be puffy but to still fill your finger indentation back in at least partly. At that stage, sprinkle with more semolina or bread flour, make a couple slashes, replace lid and bake as directed.
The description says to bake at 400 degrees but the instructions say 480. Is this a typo? Which is correct?
I add feta and kalamata olives to this recipe. Do I need to adjust anything?
Can the dough for this bread be made in a bread machine, then back in an oven?
Yes absolutely, Turkish villager bread (çoban ekmek) is almost similar to Greek village bread and using the “dough” setting on your machine with instant yeast replaces the need for a 10 hour rest.
I can make a 900 gramme loaf in 2 hours.
Just repeating Sharon’s question description says “Preheat the oven at high temperature (200-210C/ 400F). Bake the bread for 45 minutes with the lid on and another 20 minutes without the lid, until its crusty and golden brown”
Recipe instructions are ” Preheat the oven at 250C/ 480F. Bake for 20 minutes with the lid on and another 15 minutes or so with the lid removed, until nicely coloured and crusty”.
I’m leaning toward 480F oven as I think that temp would create lots of steam quickly to create the great crusts. but a definite answer would be great.
Hi did you ever get an answer to oven/timing query?
Hi Eve,
In the narrative, you say to bake covered for 45 minutes at 400°F & uncovered for another 20. But on step 8 of the instructions, you say to bake at 480°F (which sounds high) for 20 min with lid on and 15 min with lid off. Which is it? I didn’t notice the discrepancy till I started baking, so I reset the temp to 425 & am keeping an eye on it. I hope it turns out ok.
Is it necessary to heat the dutch oven before baking?
Yes
this was delicious
Does anything change if I didn’t cut into two loves and left it as one large one?
Your instructions are still confusing. What is the correct baking temp? Is it 480 or 400 F? Bake times? Let it proof a second time after shaping? The dutch ovens you speak of? Do you preheat it in the oven?
I’m just a home baker but I’ve made this a bunch.
Dutch oven should not be preheated in the oven – I line with parchment and let my loaf proof in it one final time before baking.
Final proofing needed after shaping? Yes, always.
The high temp is accurate . You want to create steam quickly. My oven runs very hot so I have to turn down to 450 though, so may need to pay attention to your oven. But basically, follow the baking instructions in the recipe step 8, not the narrative.
Another reason such high temperatures: you are creating a crispy, crunchy crust.
Best of luck!
I was so excited to find this recipe and try it! I love the bread from my childhood. My dough was much wetter than described … it’s in the oven now but I don’t have high hopes ☹️ any recommendations? Thank you
480 f it’s way too much and timing way too long
The questions regarding time and Temperature still NEED answering. 250C/480F seems awful HOT.
Otherwise looks like a winner recipe…..
A 10 hour rise? I used, as directed, instant yeast 1/3 the amount of fresh yeast.
3 hours later in a cool temperature, the loaf was climbing out of my rising bucket and more than 3x the original size.
Καλημέρα. What do you mean when you say “Fresh Yeast?” As in a liquid starter as in sourdough?
Καλημέρα Ελί. What do you mean when you say “Fresh Yeast?” As in a liquid starter as in sourdough?
Curious, as it says 400′ in the directions in the intro for 1 hour and 5 minutes bake time total. It says, 480′ for 35 minutes total in the recipe. Which is it?