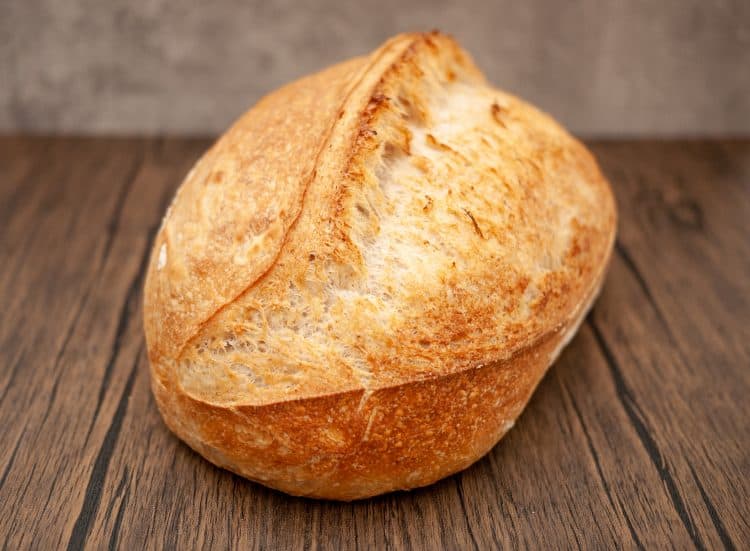
Who said homemade sourdough bread needs to be difficult? This is my super easy sourdough bread recipe with starter (psomi me prozimi) for you to make every day with minimal effort and superb taste!
If you’re like me and the current lockdown has pushed you to explore your bread making skills you would have been overwhelmed with how complicated and difficult most homemade sourdough bread recipes are. Thing is, it doesn’t have to be this way!
Method for homemade sourdough bread recipe with starter
In this simple and easy sourdough bread recipe with starter I will take you through my method for:
Preparing the sourdough starter.
Feeding the starter.
Preparing the dough for the sourdough bread.
Shaping and proofing your dough.
Baking the sourdough bread.
The recipe!
And of course all my tips and tricks so you get that amazing open crumb and crackly texture in your homemade sourdough bread that you crave for! For the full recipe scroll down to the recipe card at the end of the page. So, let’s get started!
Preparing your sourdough starter for your sourdough bread
A strong healthy sourdough starter is key to making a delicious homemade sourdough bread. Most sourdough bread recipes with starter I’ve seen call for you to prepare your own starter. However this process usually takes time – about 1 to 2 weeks and it may not always be successful.
So if you want to spare yourself the effort and get fool proof results every time simply buy a ready made culture from Amazon or your local bakery. Personally, I bought this one from Amazon and I was amazed by how well it works. And most importantly, it is reliable, consistent and needs very little maintenance!
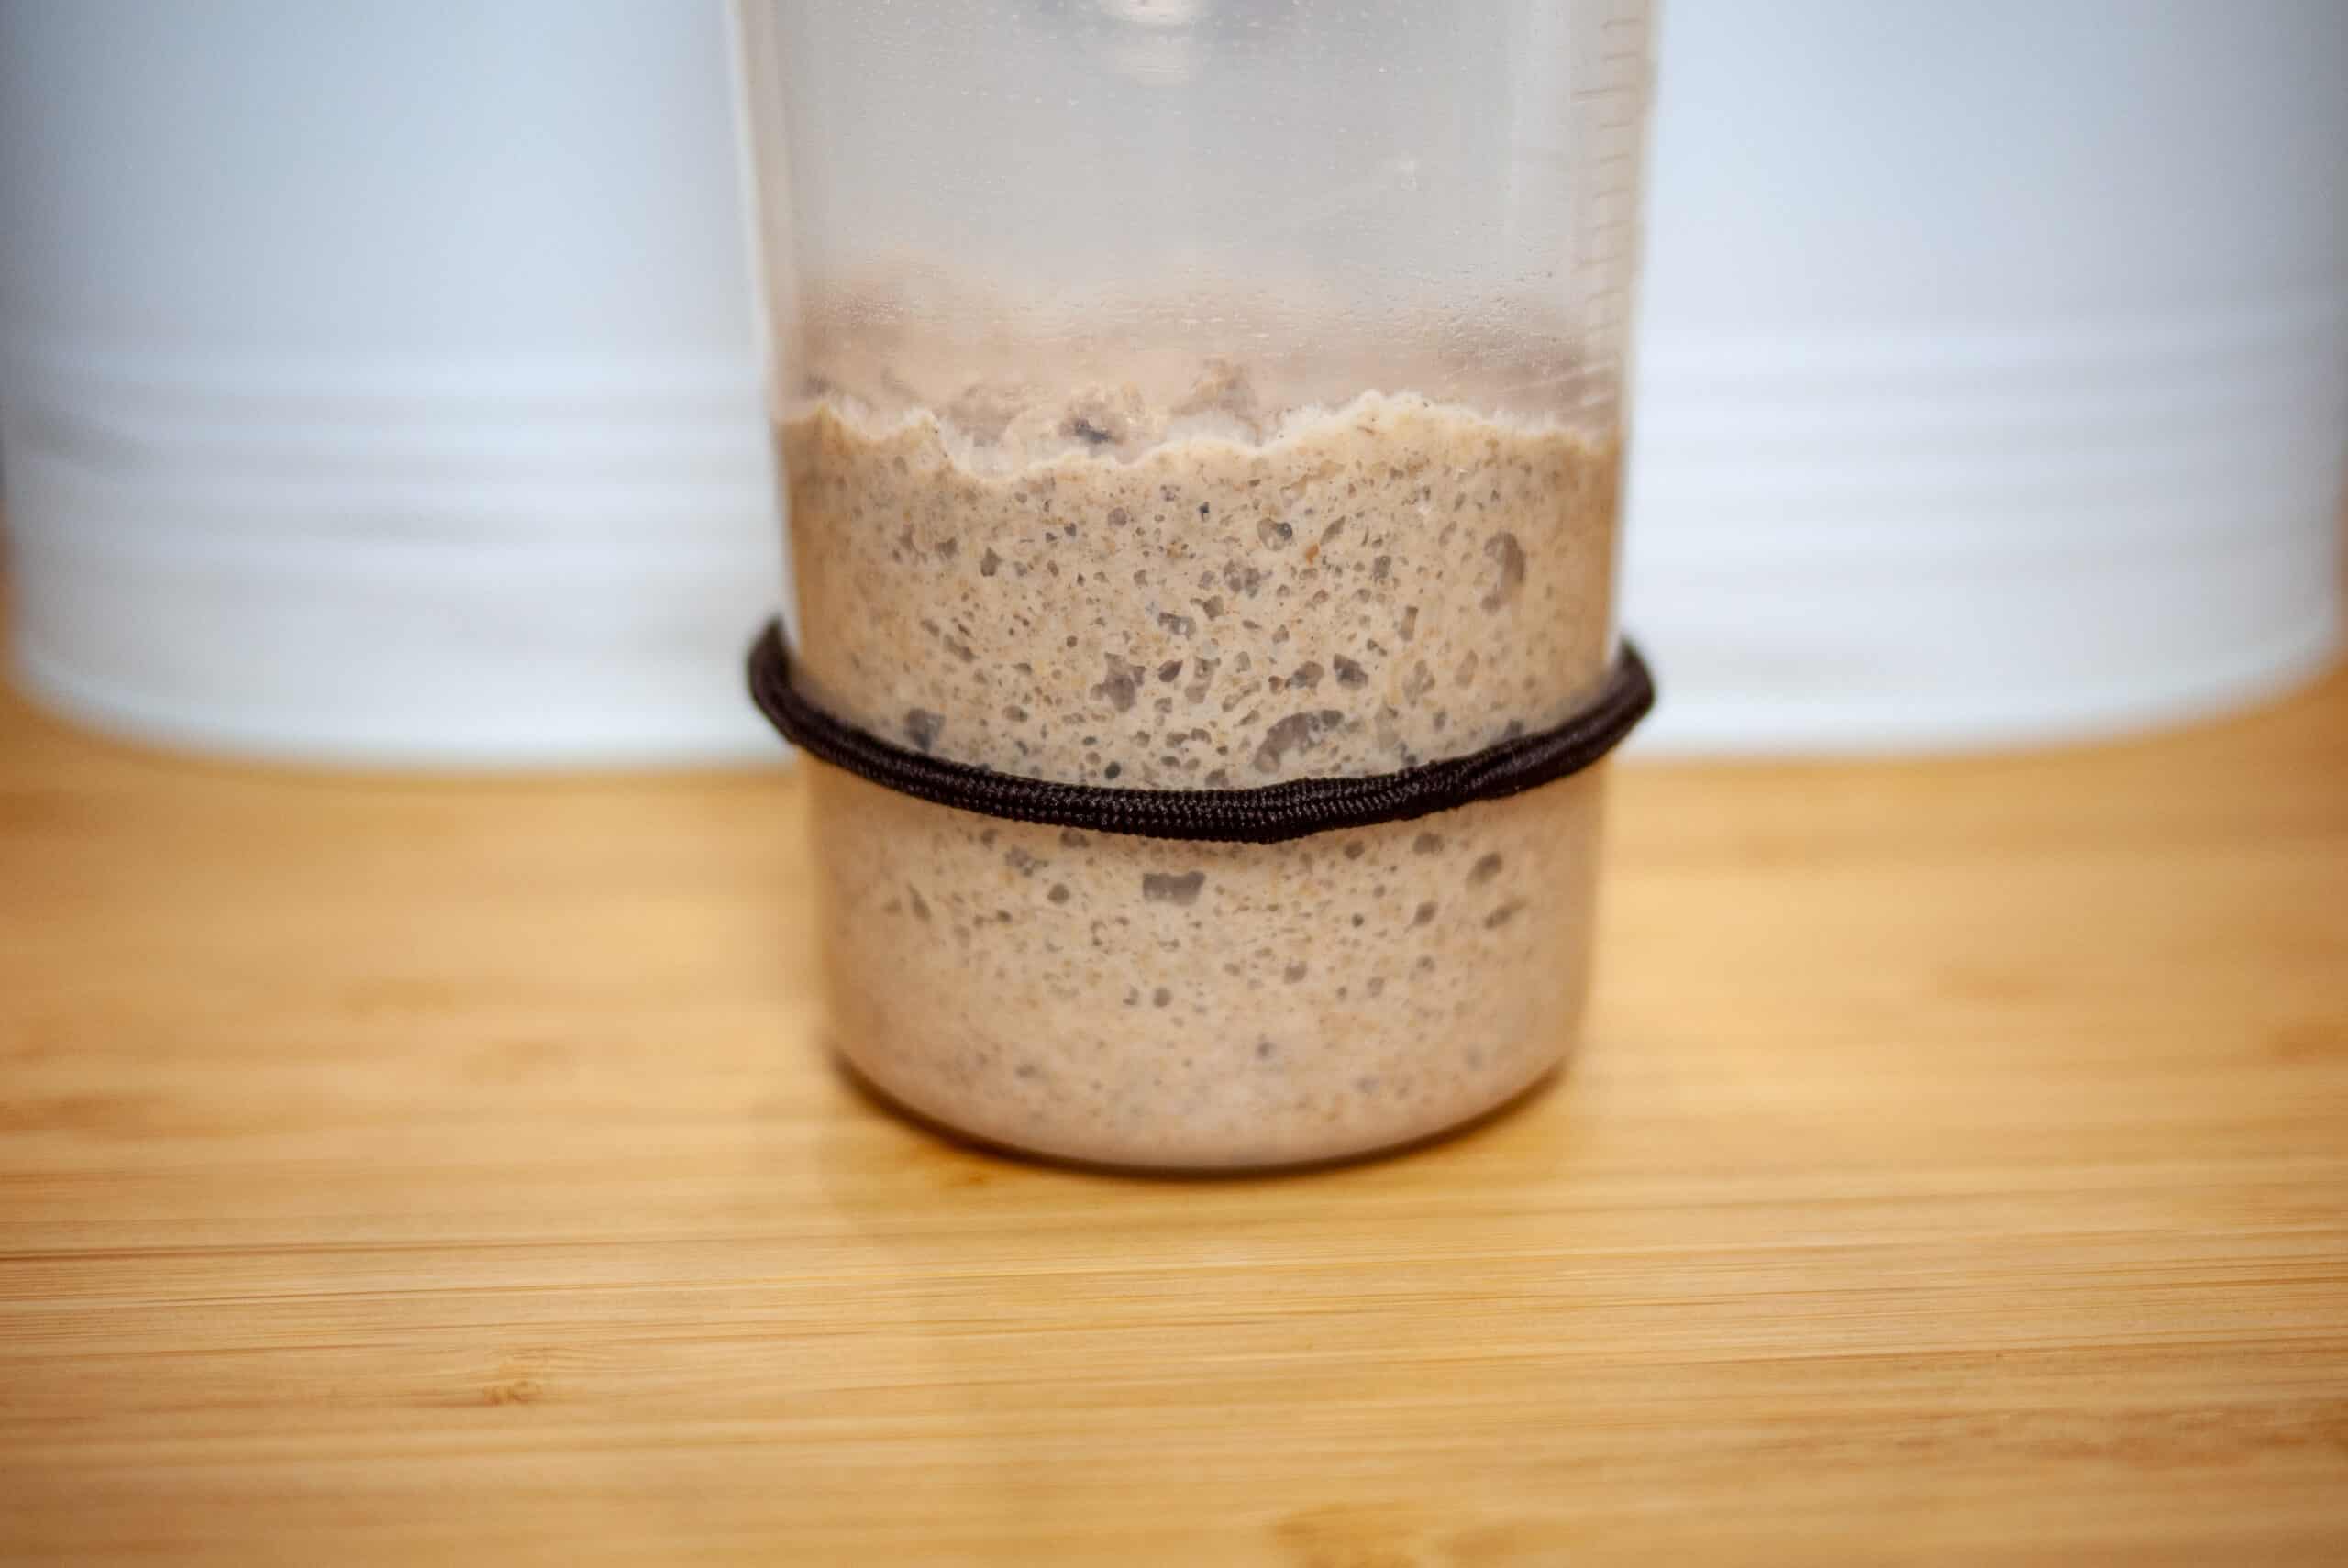
Feeding your sourdough starter
The starter is a mix of fungi and yeasts that need regular feeding with flour and water to keep it alive, active and healthy. If you bake more than 3 times a week I have found it is best to feed your sourdough starter every day. If you bake weekly, its best to feed it once a week and keep it in the fridge.
How do I go about feeding it? It depends on when I plan to bake my sourdough bread:
If I plan on baking the next day, I keep 20grams of starter (0.7 ounces) and add 40 grams (1.4oz) of whole wheat flour and 40 grams of water (1.4oz). I then let it sit on the counter overnight for it to grow and double in size.
If I plan on baking a few days later I just to a “maintenance feed”. I keep 10grams of starter (0.3oz) and add 20 grams (0.6oz) of whole wheat flour and 20 grams (0.6oz) of water. I do this daily when not baking.
Preparing your sourdough bread dough
I must admit, preparing the bread dough was what I’ve found to be the most challenging and time consuming part of making sourdough bread. Most recipes that I’ve seen required spending multiple hours kneading, letting it rise, kneading again and so forth. So I’ve developed a couple of “cheats” to help me make my sourdough bread easily with as little effort as possible!
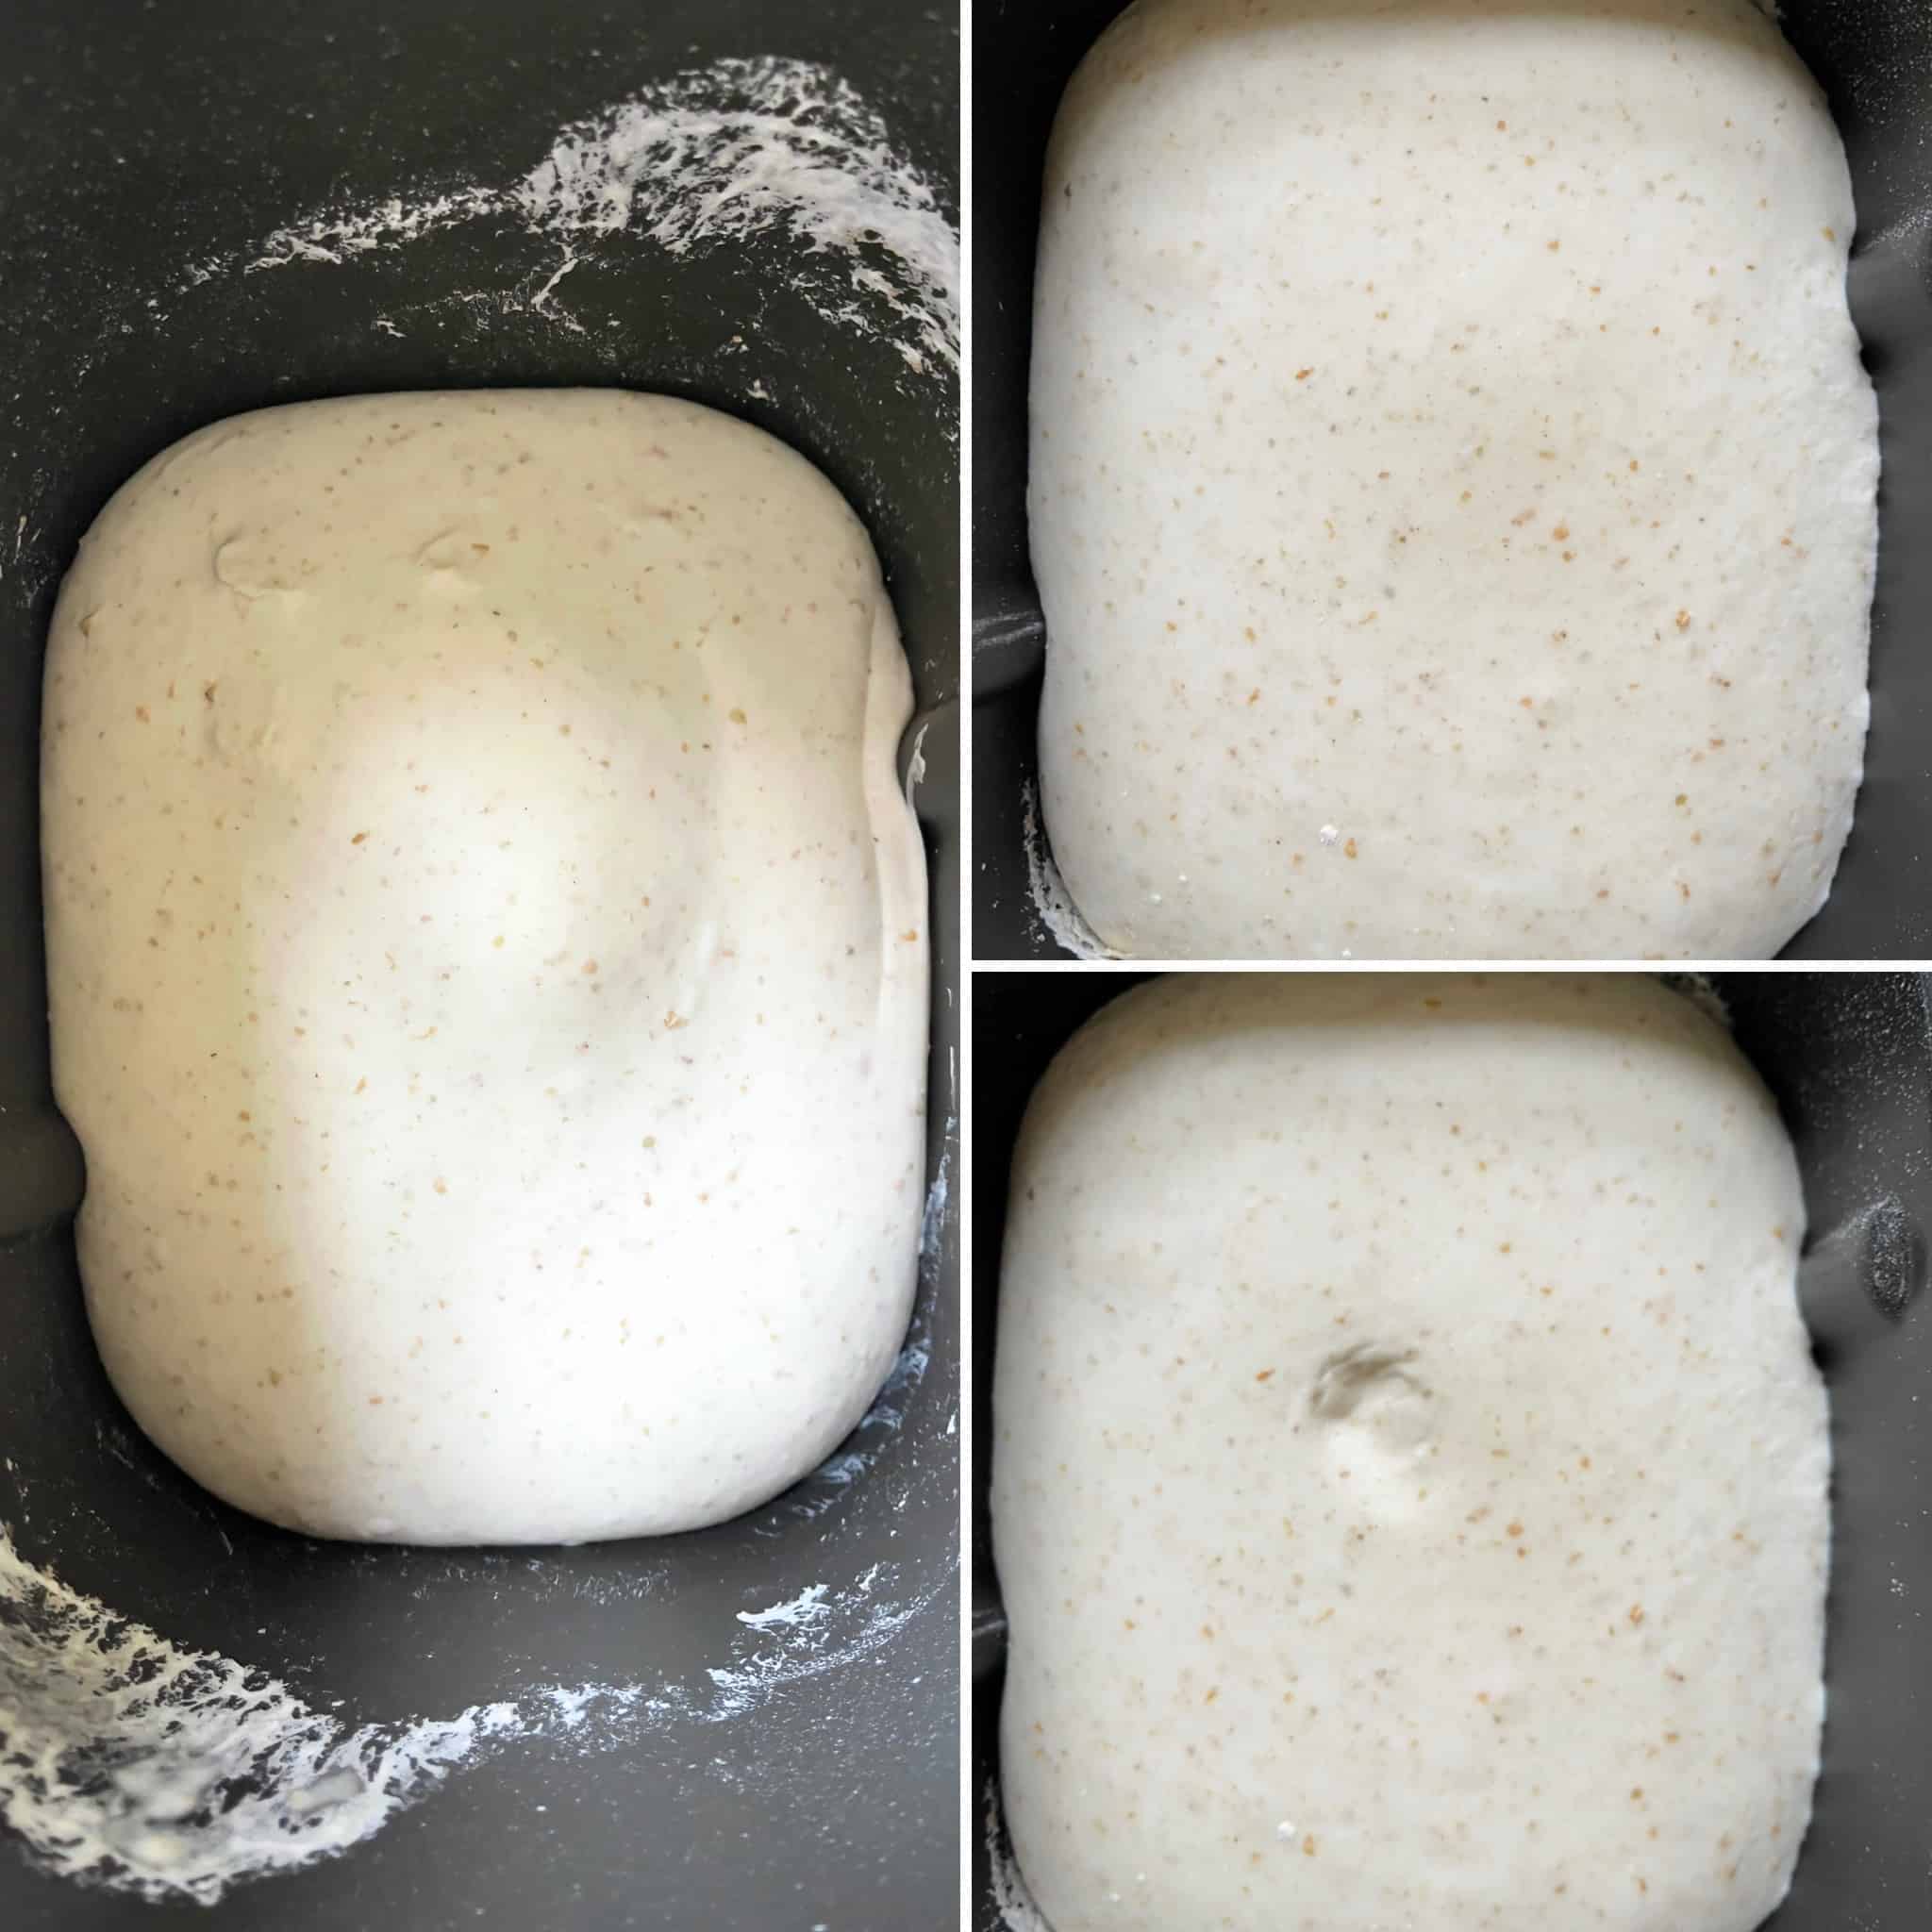
If you have a bread machine, use it to make your sourdough bread dough! Last year I bought a Panasonic SD-ZX2522 bread machine so I’ve been using it to prepare my dough without me needing to do any of the manual work. If you have one, my advice would be to put all the ingredients in the bread machine and use the sourdough menu to do all the kneading and proofing. For the Panasonic SD-ZX2522 its menu 29 and for the Panasonic SD-ZB2512 its menu 26. Then let it rest in the machine for 1 to 2 more hours until it has risen by a quarter (25%)!
If you don’t have a bread machine use your stand mixer. Put all the ingredients in, put the dough hook on, set it to low and let it knead for 10-15 minutes until the dough has come together. Let the dough rest for 1 hour and repeat. Do this another 2 times until the dough is smooth and elastic. Cover it with cling film and let it rise until it has risen by a quarter (25%).
TIP: Do the poke test. Bulk fermentation is done when you poke the dough and it springs back leaving all but a small dimple in the dough! Due to the high amount of water in this recipe you may find the dough becoming a bit sticky. This is intentional as it will give it an amazing open crust. If the dough becomes too sticky, let it rest for 15 minutes and try again.
Shaping and proofing your sourdough bread dough
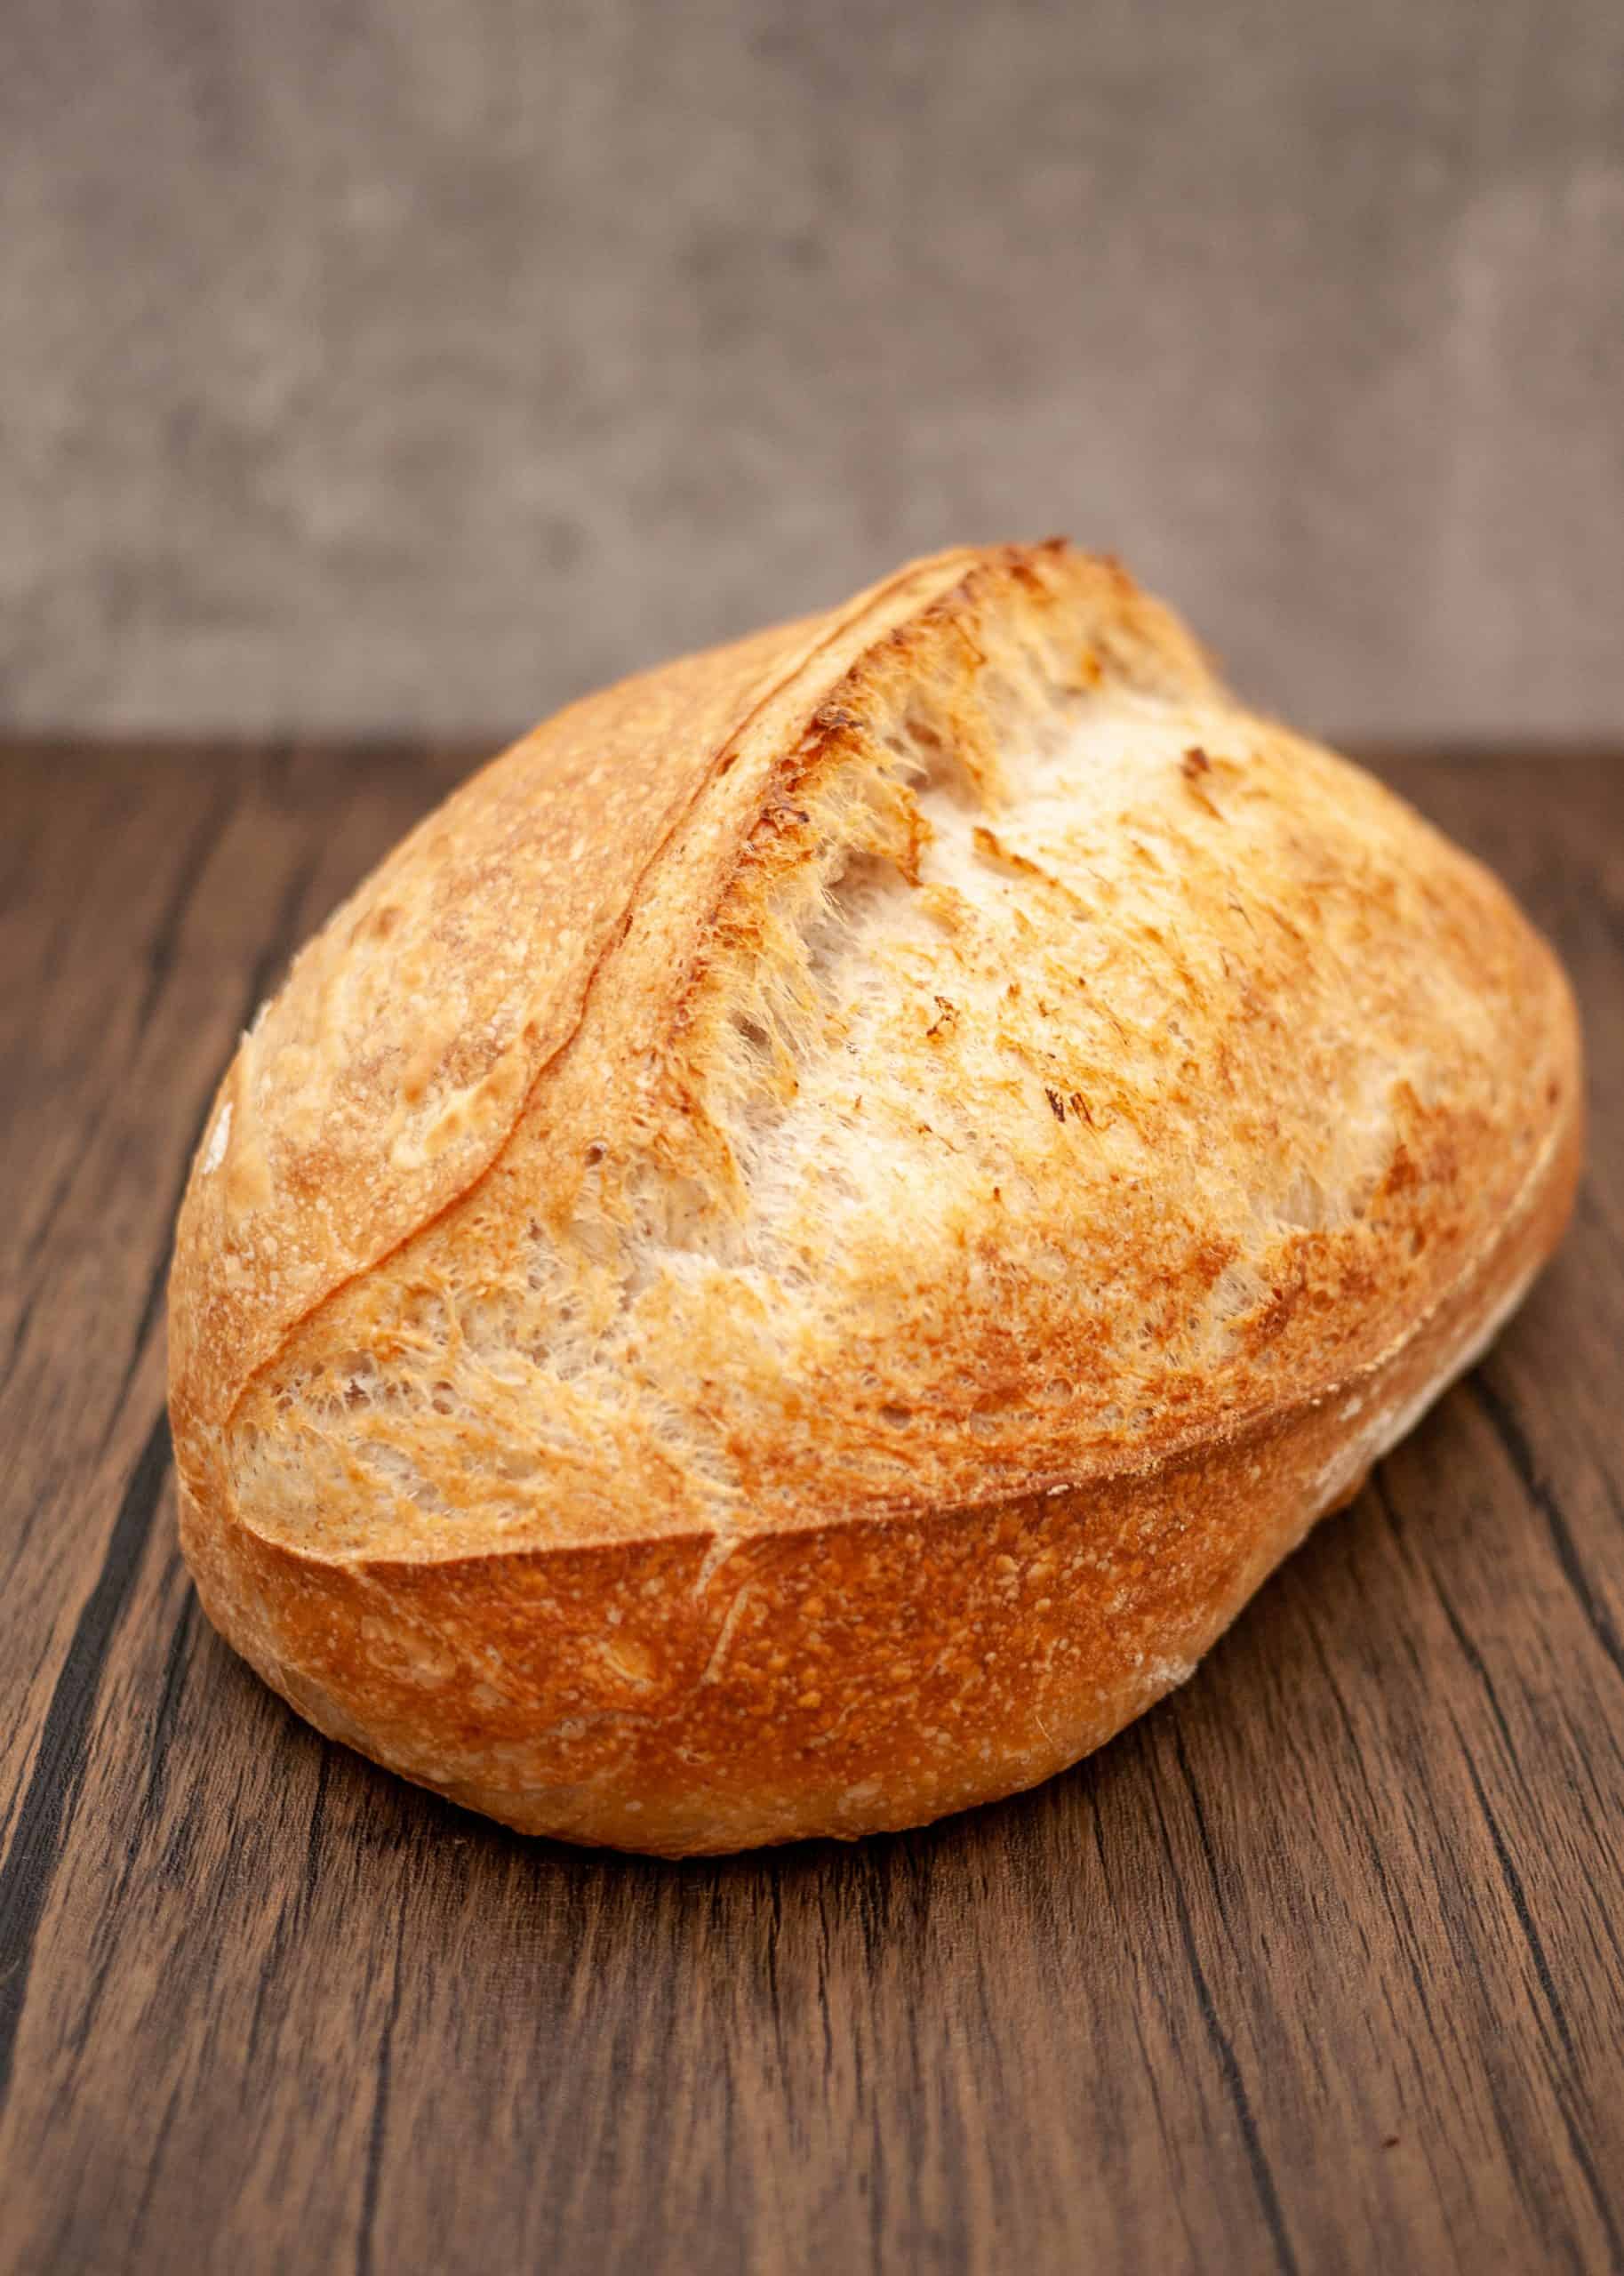
This is the fun part! You can get creative and shape your dough in many different shapes to suit your taste! My personal favourite is making it into a boule, a round ball with a nice deep score in the middle. You can also shape it into a batard, which is an oblong shape, more akin to a traditional loaf.
Shaping plays a critical role in getting a decent rise and volume in your homemade sourdough bread. If you don’t shape the dough properly with enough tension it will flatten out and won’t rise as much when baking. So here are my tips to getting the perfect shape and oven spring!
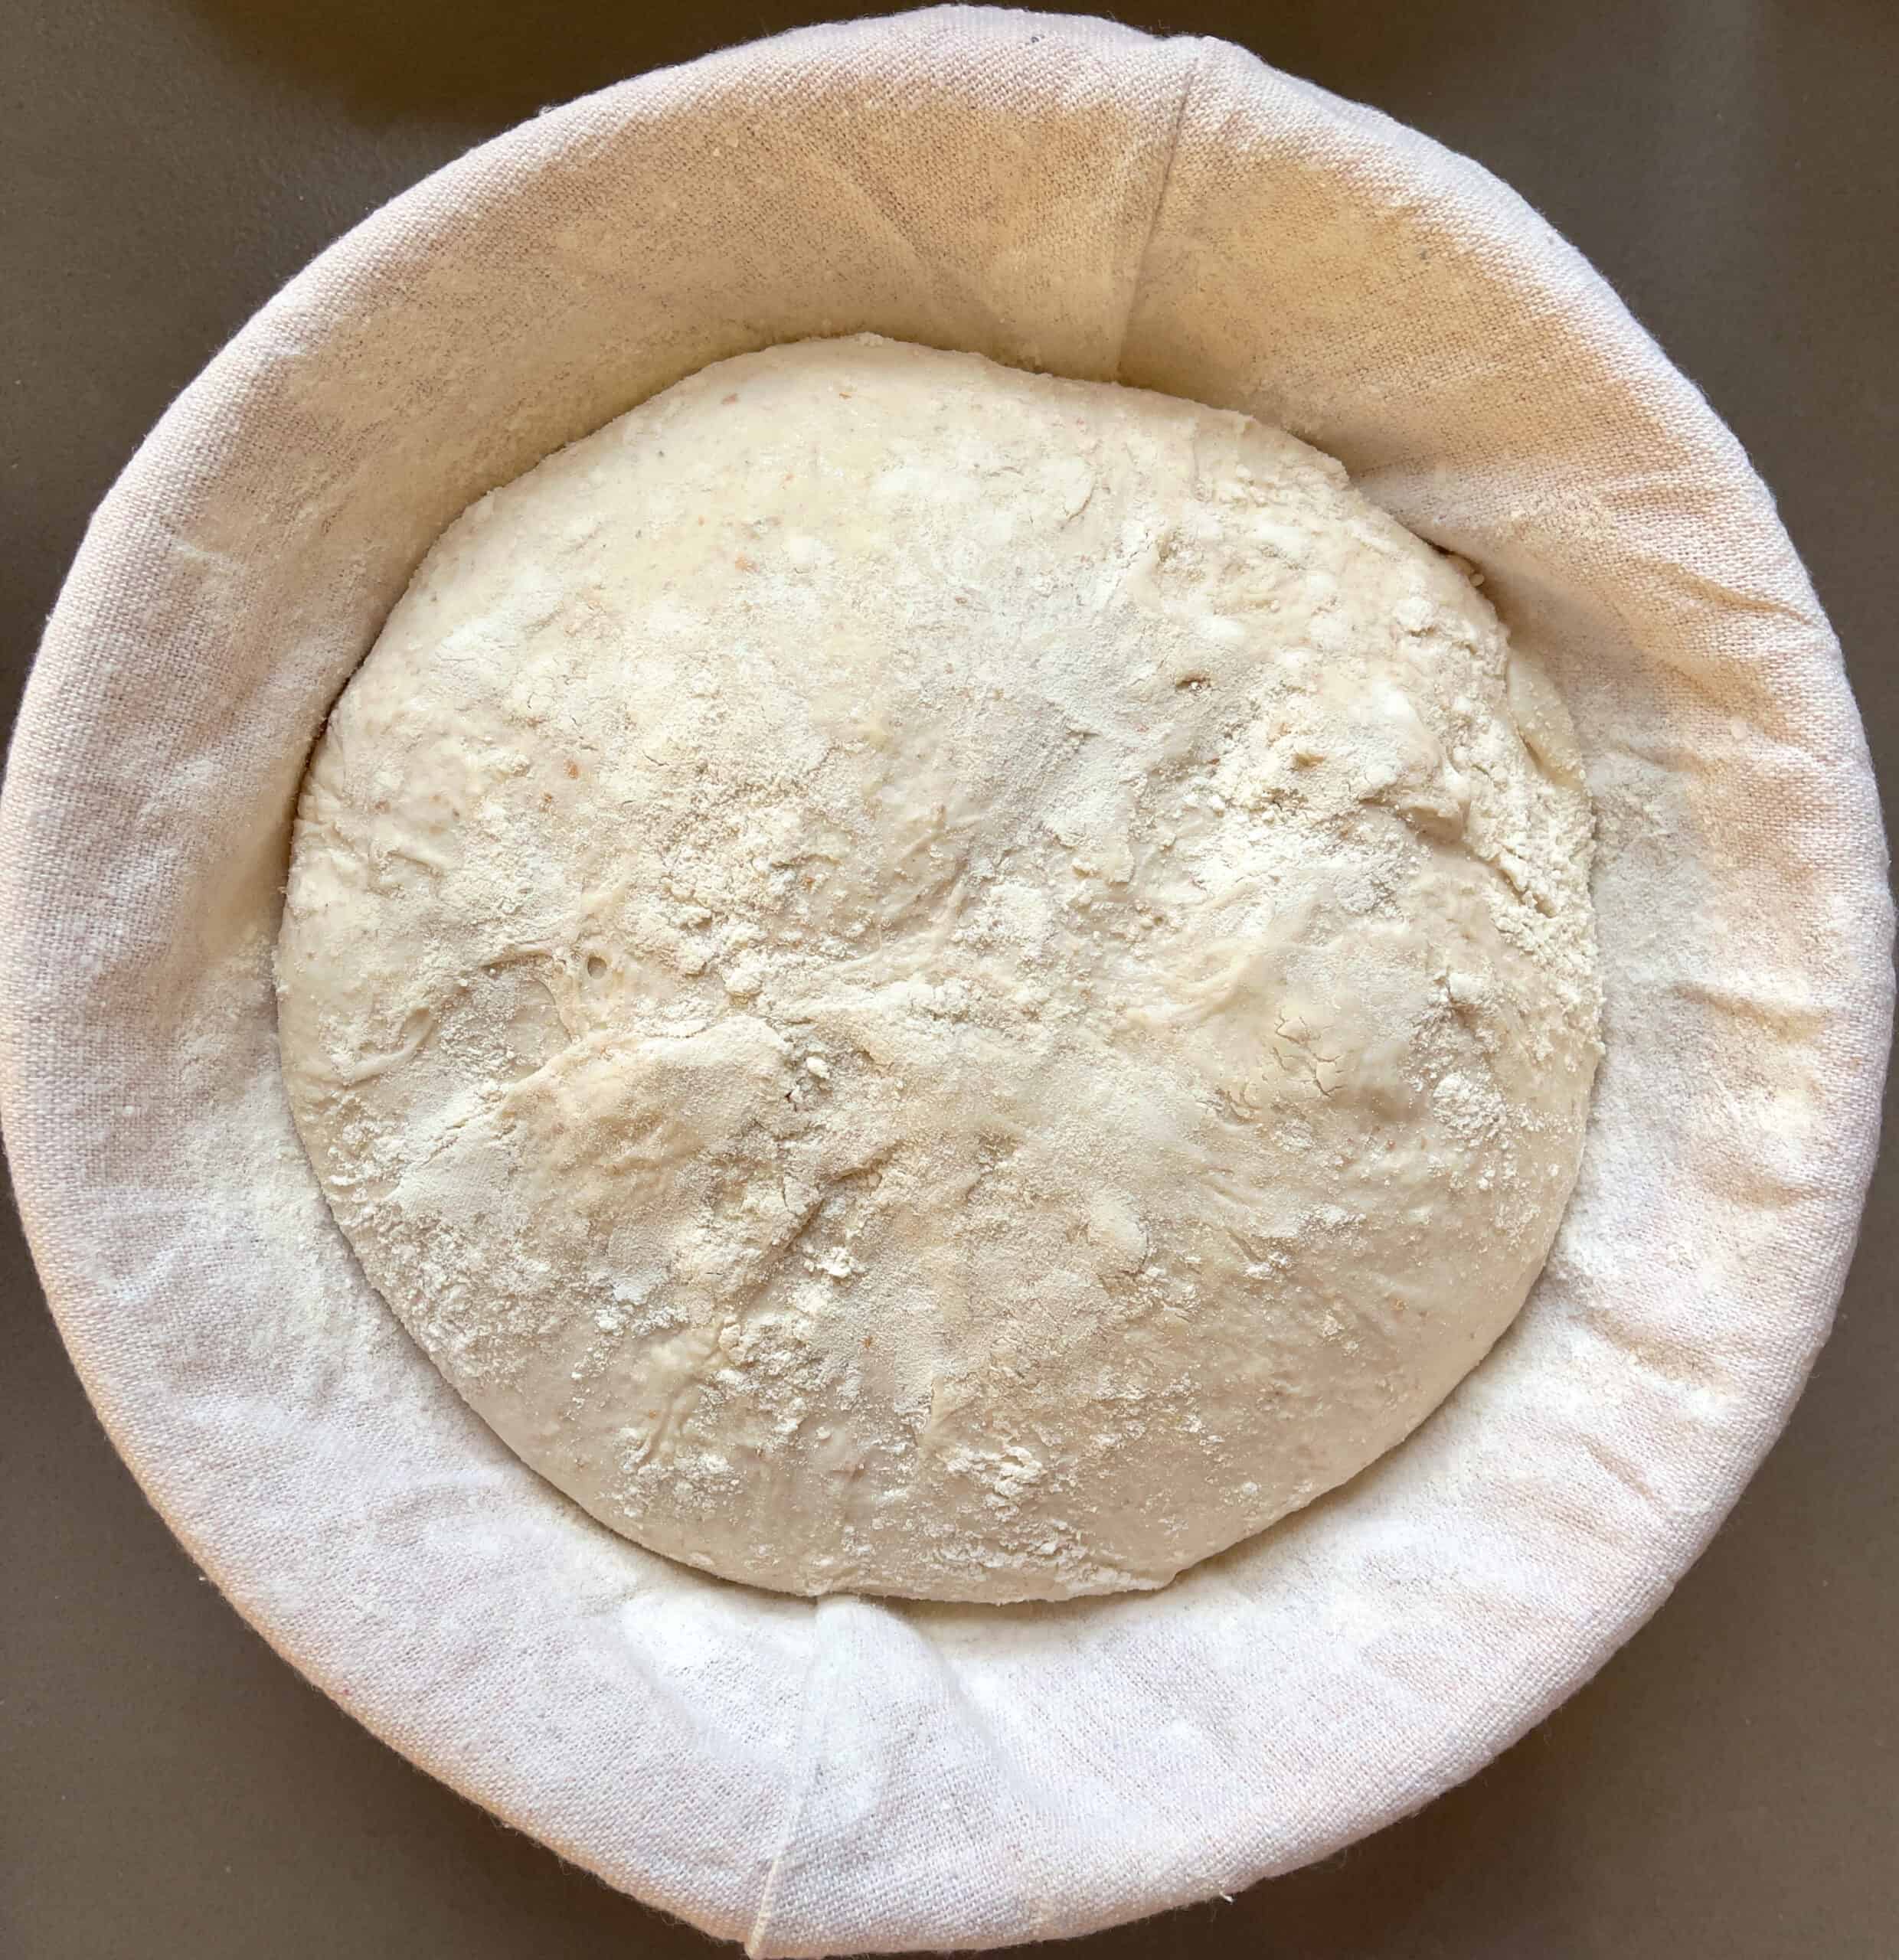
Use a proofing basket (or a bowl)! Your dough will be a bit slack when coming off the mixing bowl so you need a container that will help it keep its shape when rising for the second time. If you are planning to bake often get yourself a 25 cm / 10 inch bread proofing basket (banneton) from Amazon. Alternatively, you can use a large bowl, lined with a thick weaved terry cloth, linen cloth or tea towel.
Make sure your cloth is dusted with plenty of flour! Dusting your cloth with flour will prevent your bread from sticking to it during the second rise. So make sure your cloth is dry and that you sprinkle plenty of flour on it and rub it in with your hands!
Shape your dough into a taught round ball (if making a boule). Tip over the dough on a floured work surface and sprinkle some flour on your hands. Pull one edge at a time and fold toward the center and across until you have a nicely taught ball. Using a dough scraper, flip the dough over and pull the dough across your work surface to give it some tension on top. Using your dough scraper, flip it over again and place it in the proofing basket, bottom side up. If your dough is still slack, pull in the edges again over to the center till it feels taught.
If you’re making a battard (oval loaf), tip the dough on a floured work surface and sprinkle some flour on your hands. Pull the four edges of the dough to flatten the dough into a rectangle. Fold the left side of the dough to the centre (like making a paper aeroplane!). Fold the right side of the dough to the centre. Roll the dough by pulling the bottom of the dough towards yourself and rolling forwards. Flip it upside down and place in a floured proofing basket.
Proof your dough in the fridge overnight! Cover your proofing basket with cling film and place it in the fridge to rest. Depending on your schedule you can proof your sourdough overnight and up to 1 day. The longer the dough is in the fridge the more complex flavours will develop. Plus it gives you flexibility to bake your sourdough bread when you want it!
TIP: Be careful not to poke all the air out of the dough. Handle it gently. You want to keep as many of the air bubbles in as possible. Also if the dough starts to become too sticky, let it rest for 15 minutes and then try to shape it again.
Baking your easy homemade sourdough bread
Hands down, the best way to bake your homemade sourdough bread is using a dutch oven. A dutch oven mimics the steam baking process that is used in professional bakeries. It traps the dough’s steam during baking, keeping the top crust soft and allowing for the dough to rise and expand. This results in exceptional oven spring, rise and that delicious open crumb you’ve been craving for!
So how do you do it? All you need is a large steel or aluminum pot, 25/30 cm wide (~10 inches). Place your pot with its lid on in your oven and turn it on at 230C/450F fan. Let your oven warm up for about 1 hour.
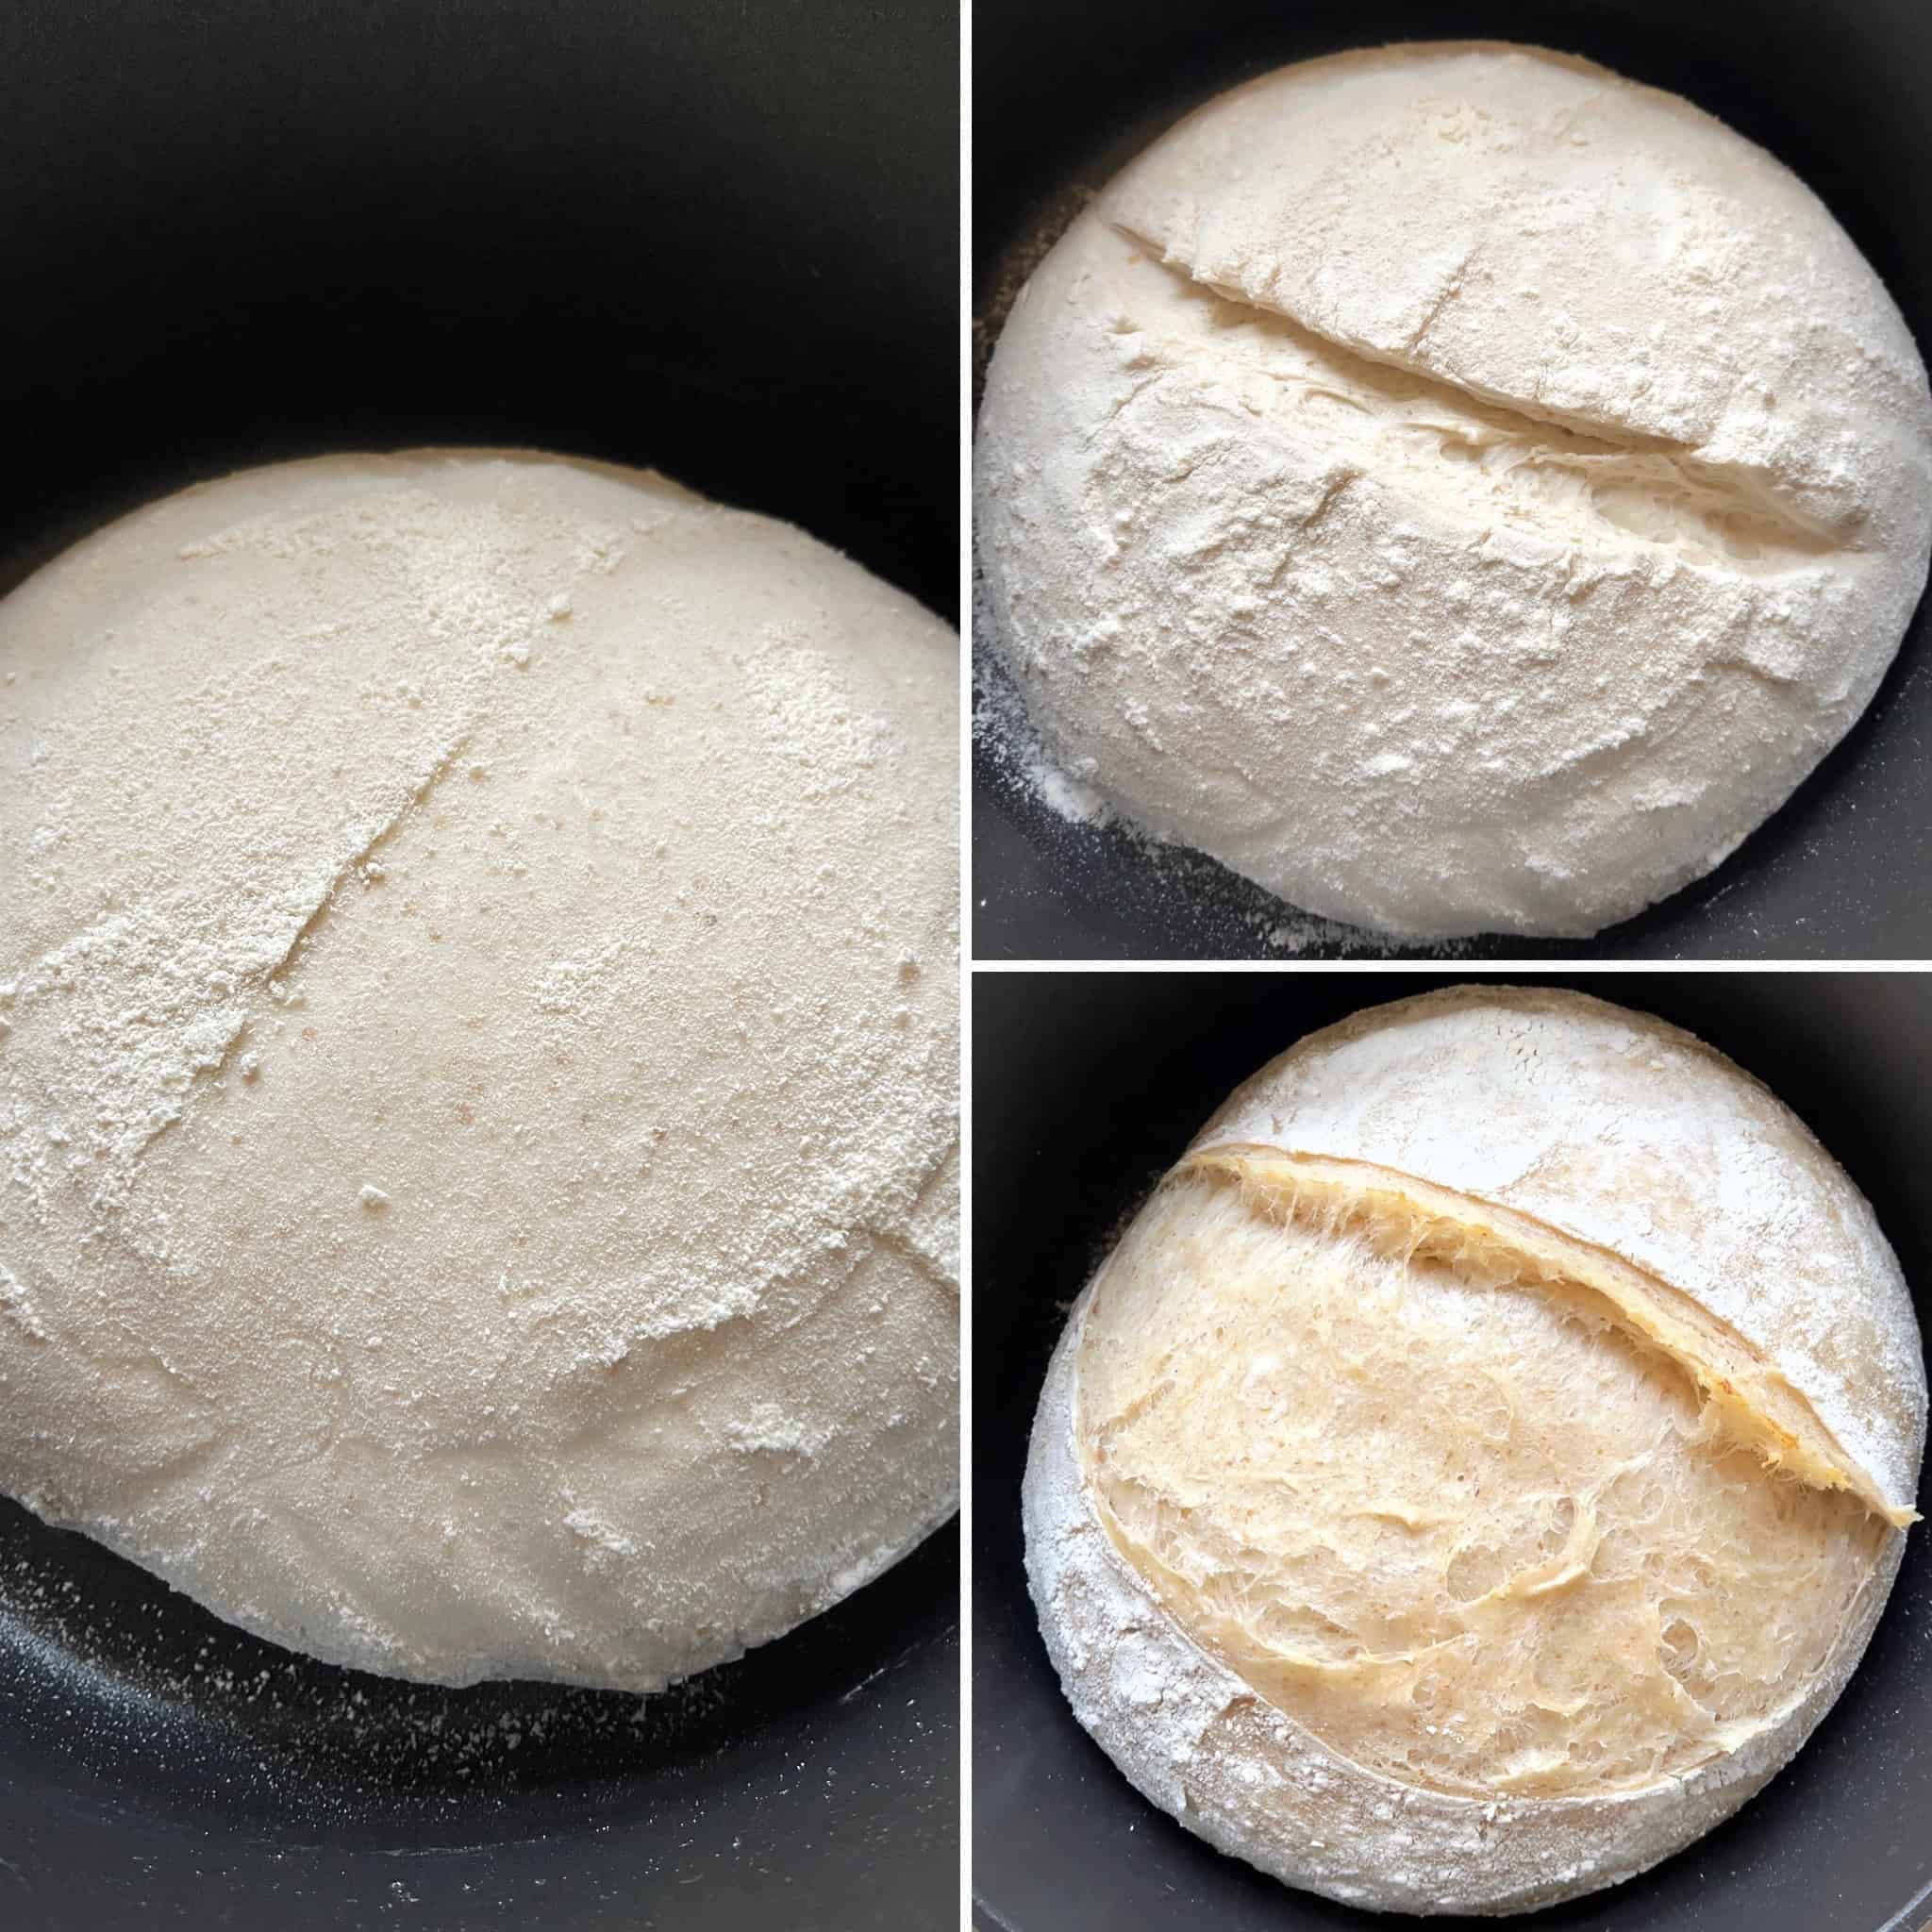
When the oven is hot, remove your dutch oven from the oven, take your bread out of the fridge, tip it over and score it using a sharp knife, scissors or a razor, lengthwise, about 3 cm / 1 inch deep and at a shallow 30 degree angle. This will result in your homemade sourdough bread opening up beautifully when baked and developing that wonderfully tasting ear! Sprinkle some flour on top for that artisan look!
When done, put the lid back on and place it back in the hot oven for 20 minutes. During this first stage, the bread will cook while also steaming on the outside. This will result in the bread puffing up and developing its “ear”.
Finally, once the 20 minutes are up, take your dutch oven out of the oven, remove the lid and place back in again for another 15 to 20 minutes or until deep golden brown on the outside.
Your bread is now done! Remove it and tip it over on an airing rack and let it cool down for 30 minutes to 1 hour until it has reached room temperature.
How to store your homemade sourdough bread
The secret to keeping your sourdough bread fresh is to control its moisture. Therefore, never store your bread in an airtight container as this doesn’t let the moisture out and the bread will become soggy and mouldy. But also don’t store it on the counter as it will go dry and stale quickly.
The best way to keep your easy homemade sourdough bread from going stale is to keep it in a bread basket. This allows just enough moisture out while still retaining some on the inside. Alternatively wrap it in a paper bag or, if you’re in a pinch, with some parchment paper.
Love homemade bread? These delicious bread recipes are made for you!
If you love bread as much as I do, then this list of my favourite breads recipes is made for you!
Who said homemade sourdough bread needs to be difficult? This is my super easy sourdough bread recipe with starter for you to make every day with minimal effort and superb taste!
Ingredients
Scale
For a boule (round loaf) – makes a 1kg loaf / 2.2 pound loaf
80g sourdough starter (2.8oz)
530g strong white bread flour (18.7oz)
2 tsp salt
390g water (13.7 fl oz)
10 g butter (0.35oz) (Optional – for extra softness)
For a battard (oval shaped loaf) – makes a 800g / 1.7 pound loaf
65g sourdough starter (2.3oz)
430g strong white bread flour (15.1oz)
1 and 3/4 tsp salt
315g water (11.1 fl oz)
10 g butter (0.35oz) (Optional – for extra softness)
In your stand mixer bowl pour in your sourdough starter, the flour, the salt and if using it, the butter. Slowly pour in your water around the edges of the mixer bowl
Put the dough hook on your stand mixer and let it knead on low to medium speed for about 10-15 minutes. Remove the bowl from the mixer, cover with cling film and let it rest for 1 hour.
Repeat the above – place your bowl back in the mixer and let it knead for another 10-15 minutes. Once done the dough should have formed a nice smooth and a little bit sticky ball. If the dough is too sticky, let it rest for another 10-15 minutes and knead once more.
Cover with cling film and let it rest for 3-4 hours or until it has risen by a quarter (25%) in size.
If you own a bread machine use that instead to prepare your dough and let it rise. Tip all the ingredients in and set it to the sourdough cycle or, if it doesn’t have one, the dough cycle. For the Panasonic SD-ZX2522 its menu 29 and for the Panasonic SD-ZB2512 its menu 26. Then let it rest in the machine for 1 to 2 more hours with the lid shut until it has risen by a quarter (25%)!
Line your proofing basket with a terry cloth or kitchen towel and sprinkle generously with flour. Spread the flour on the cloth using your hands.
Tip the dough out from the bowl on a floured work surface. Shape your dough into a taught round ball by pulling one edge at a time and folding toward the center. Flip the dough over and using a dough scraper pull the dough across your work surface to form a round, taught ball.
Flip the dough over and place it in the proofing basket, bottom side up. If your dough is still slack, pull in the edges over to the center until it its nice and taught.
Cover with cling film and place in the fridge overnight (or longer if you prefer – up to 1 day).
Preheat your oven to 230C/ 450F with your large metal pot (dutch oven) placed inside.
Once pre-heated, remove your dutch oven, take the dough out from the fridge and tip it over in the dutch oven. Score it lengthwise with a sharp razor at a 30 degree angle or cut using scissors.
Cover with the lid and bake for 20 minutes.
Once the 20 minutes are up, remove the lid from your dutch oven and let it bake for a further 15 minutes or until deeply browned
Remove your bread from the oven and place it on an airing rack to cool down.
There are Amazon starters for use as a “ prozimi” that contains mostly baker’s yeast.
So please make your readers aware to buy only certified sourdough starters.
Of course, that is the only way to go! I bought my starter from Amazon as I wanted something reliable and found an excellent 100+ year old starter without anything added to it, that has worked brilliantly over the past 1+ years of lockdown 🙂
If its not rising, I’d suggest that the starter is not mature yet for bread baking. Or its gone a bit sluggish. Try feeding it with some rye flour and see if it doubles in around 4-5 hours. If not, discard half of the starter, repeat the rye flour feeding until it reliably rises. Then your bread will turn out awesome 🙂
This bread is perfect! The texture, chew and flavor are great! The only problem I had is that it stuck to the Dutch oven. But I just ordered a silicon lift out thing from Amazon for the next time I make it!
This recipe yielded a beautiful loaf of bread! My first loaf of sourdough and it was so easy with this recipe (I used my Kitchenaid mixer)! I followed the recipe exactly, including kneading time in the mixer. Next time I will leave the dough in the fridge a little longer so the taste is a little more sour. Otherwise, I’m very happy with the way this loaf turned out. Thank you, Eli!!!
Love this recipe. I’ve made it numerous times. I’ve taken a little leeward added fresh rosemary, caramelized onions or onion soup mix. DELICIOUS! Question about the nutrition information…it says carbs per slice.l.how many slices is it based on? Thank you
Over the past 8 years you have made My Greek Dish the number one destination for anyone searching for authentic Greek recipes! For that I cannot thank you enough!
It all started with an idea… To collate and publish all those recipes that I loved when I was young, the ones I made with so much love for my children and grand children!
So go ahead, explore my delicious collections and don’t forget to leave me a comment, connect with me on Facebook or Instagram and sign up to my mailing list so you never miss out on my latest creations!


")


There are Amazon starters for use as a “ prozimi” that contains mostly baker’s yeast.
So please make your readers aware to buy only certified sourdough starters.
Of course, that is the only way to go! I bought my starter from Amazon as I wanted something reliable and found an excellent 100+ year old starter without anything added to it, that has worked brilliantly over the past 1+ years of lockdown 🙂
If you use a stand mixer for this, I’d suggest 3 minutes kneading twice, but certainly not 30! Must be a mistake?
Yeah, I did the 30 and my bread is not rising. . I’m so upset. It seemed long but I am still learning about making bread! Uuugh.
Hi Kimmay
If its not rising, I’d suggest that the starter is not mature yet for bread baking. Or its gone a bit sluggish. Try feeding it with some rye flour and see if it doubles in around 4-5 hours. If not, discard half of the starter, repeat the rye flour feeding until it reliably rises. Then your bread will turn out awesome 🙂
I just did what it said and mine isn’t even in a ball. It’s super sticky and runny. My starter is years old too.
In the instructions, you mention adding sugar/honey. I cannot find an amount to add to the recipe. Can you please help me?
Its not needed actually (typo). I’ve updated the steps to remove it!
This bread is perfect! The texture, chew and flavor are great! The only problem I had is that it stuck to the Dutch oven. But I just ordered a silicon lift out thing from Amazon for the next time I make it!
Cut out a piece of parchment paper that is the exact diameter of your Dutch oven and drop your dough on it to bake …..”HOUSTON WE HAVE LIFT OFF
“
This recipe yielded a beautiful loaf of bread! My first loaf of sourdough and it was so easy with this recipe (I used my Kitchenaid mixer)! I followed the recipe exactly, including kneading time in the mixer. Next time I will leave the dough in the fridge a little longer so the taste is a little more sour. Otherwise, I’m very happy with the way this loaf turned out. Thank you, Eli!!!
Love this recipe. I’ve made it numerous times. I’ve taken a little leeward added fresh rosemary, caramelized onions or onion soup mix. DELICIOUS! Question about the nutrition information…it says carbs per slice.l.how many slices is it based on? Thank you