Ever since I remember baking, I always wondered whether I can make self raising flour bread. Conventional baking wisdom would dictate that you always need yeast and strong bread flour to make bread.
But sometimes you just don’t have any laying around. So I made this amazing bread with only four ingredients and best of all? Its preparation lasts less than the walk to the nearby bakery store! Only 10 minutes!
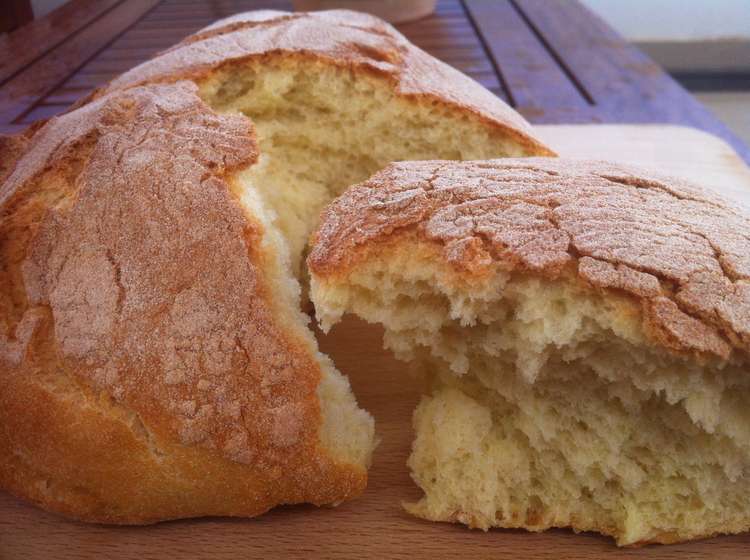
Try out this super easy bread with self rising flour recipe and you will be rewarded with a crispy golden-brown crust, a fluffy, soft and slightly chewy delicious loaf of bread. Enjoy while still warm with a spread of your favorite creamy butter or as a side to your delicious moussaka!
Baking powder acts very similarly to soda when making bread and the Irish just love soda breads! In contrast to yeast, baking powder acts very differently when making bread. As soon as water is combined with the self-raising flour it starts to act, producing air bubbles that give the bread that fluffy appearance and texture.
On the other hand, yeast requires time to digest the sugars and ferment the bread. So while a yeast bread may need 4-5 hours to prove this self raising flour bread is ready to bake almost immediately.
Do you need yeast when using self-raising flour to make bread?
No, at least not the traditional bread yeast. When using self rising flour the bread proofs much faster. Therefore, if you also add yeast to it you will need to wait for it to act.
As a result your bread will be way over-proofed and will most likely collapse while baking. However, by skipping the yeast entirely you will loose out on that delicious bread flavour. To make your bread taste delicious, there are three tricks that make all the difference.
How to make the perfect easy self raising flour bread
There are three things that make this self raising flour bread taste simply amazing.
Firstly its the beer. It contains natural yeast that will substitute that bread-y flavour that yeast would normally give. Beer also contains air bubbles that will give your bread a delicious soft and chewy texture.
The second trick is not to let the bread prove at all. When you are done kneading it, shape it and bake it. This will contain how much the bread rises and it won’t collapse.
The third trick is kneading. Self raising flour doesn’t contain as much gluten as bread flour so its best to put in a little extra elbow grease in to let the gluten develop or just use a hand mixer with a dough hook to do the work for you.
Love bread? These delicious bread recipes are made for you!
If you love bread as much as I do, then this list of my favourite breads recipes is made for you!
What I love the most about having freshly made bread is soaking up that a delicious stew sauce, dipping it in my salad and of course covering it with delicious dips! Take a look at my very best dishes that go great with this bread in the links below!
A super easy bread recipe using only four ingredients! As you are using self rising flour and beer for this easy bread recipe, you don’t need to wait for the dough to rise. So more time to enjoy it!
Ingredients
Scale
500g self-rising flour (17.5 ounces) without added salt. If you’re in the US, the self raising flour most likely contains salt already added to it. If you can’t find any flour without salt, try using plain flour and add 6 flat teaspoons of baking powder to the mix.
330ml beer, blonde pale lager such as bottled Heineken (1 1/3 of a cup)
To prepare this easy bread recipe, add into a basin all the ingredients and blend with your hands, until the dough becomes an elastic ball. Alternatively, add all the ingredients into a bowl and mix using your hand-mixer with the dough hook attached until the dough is soft and does not crumble. Depending on the kind of flour used, the weather and many other factors, you may not need to use all the flour, or you may need some more. Leave 50g of flour aside and add a little bit at a time, until the dough is firm and not too sticky.
Preheat the oven to 200C (400F) (with both top and bottom heating elements on) or 180C (350F) fan. Because in this easy bread recipe you are using self-rising flour and beer it is not necessary to wait for the dough to rise.
Turn the dough out onto a floured board, wet your hands and split it in half. Knead each half with your hands, to form two round loafs.
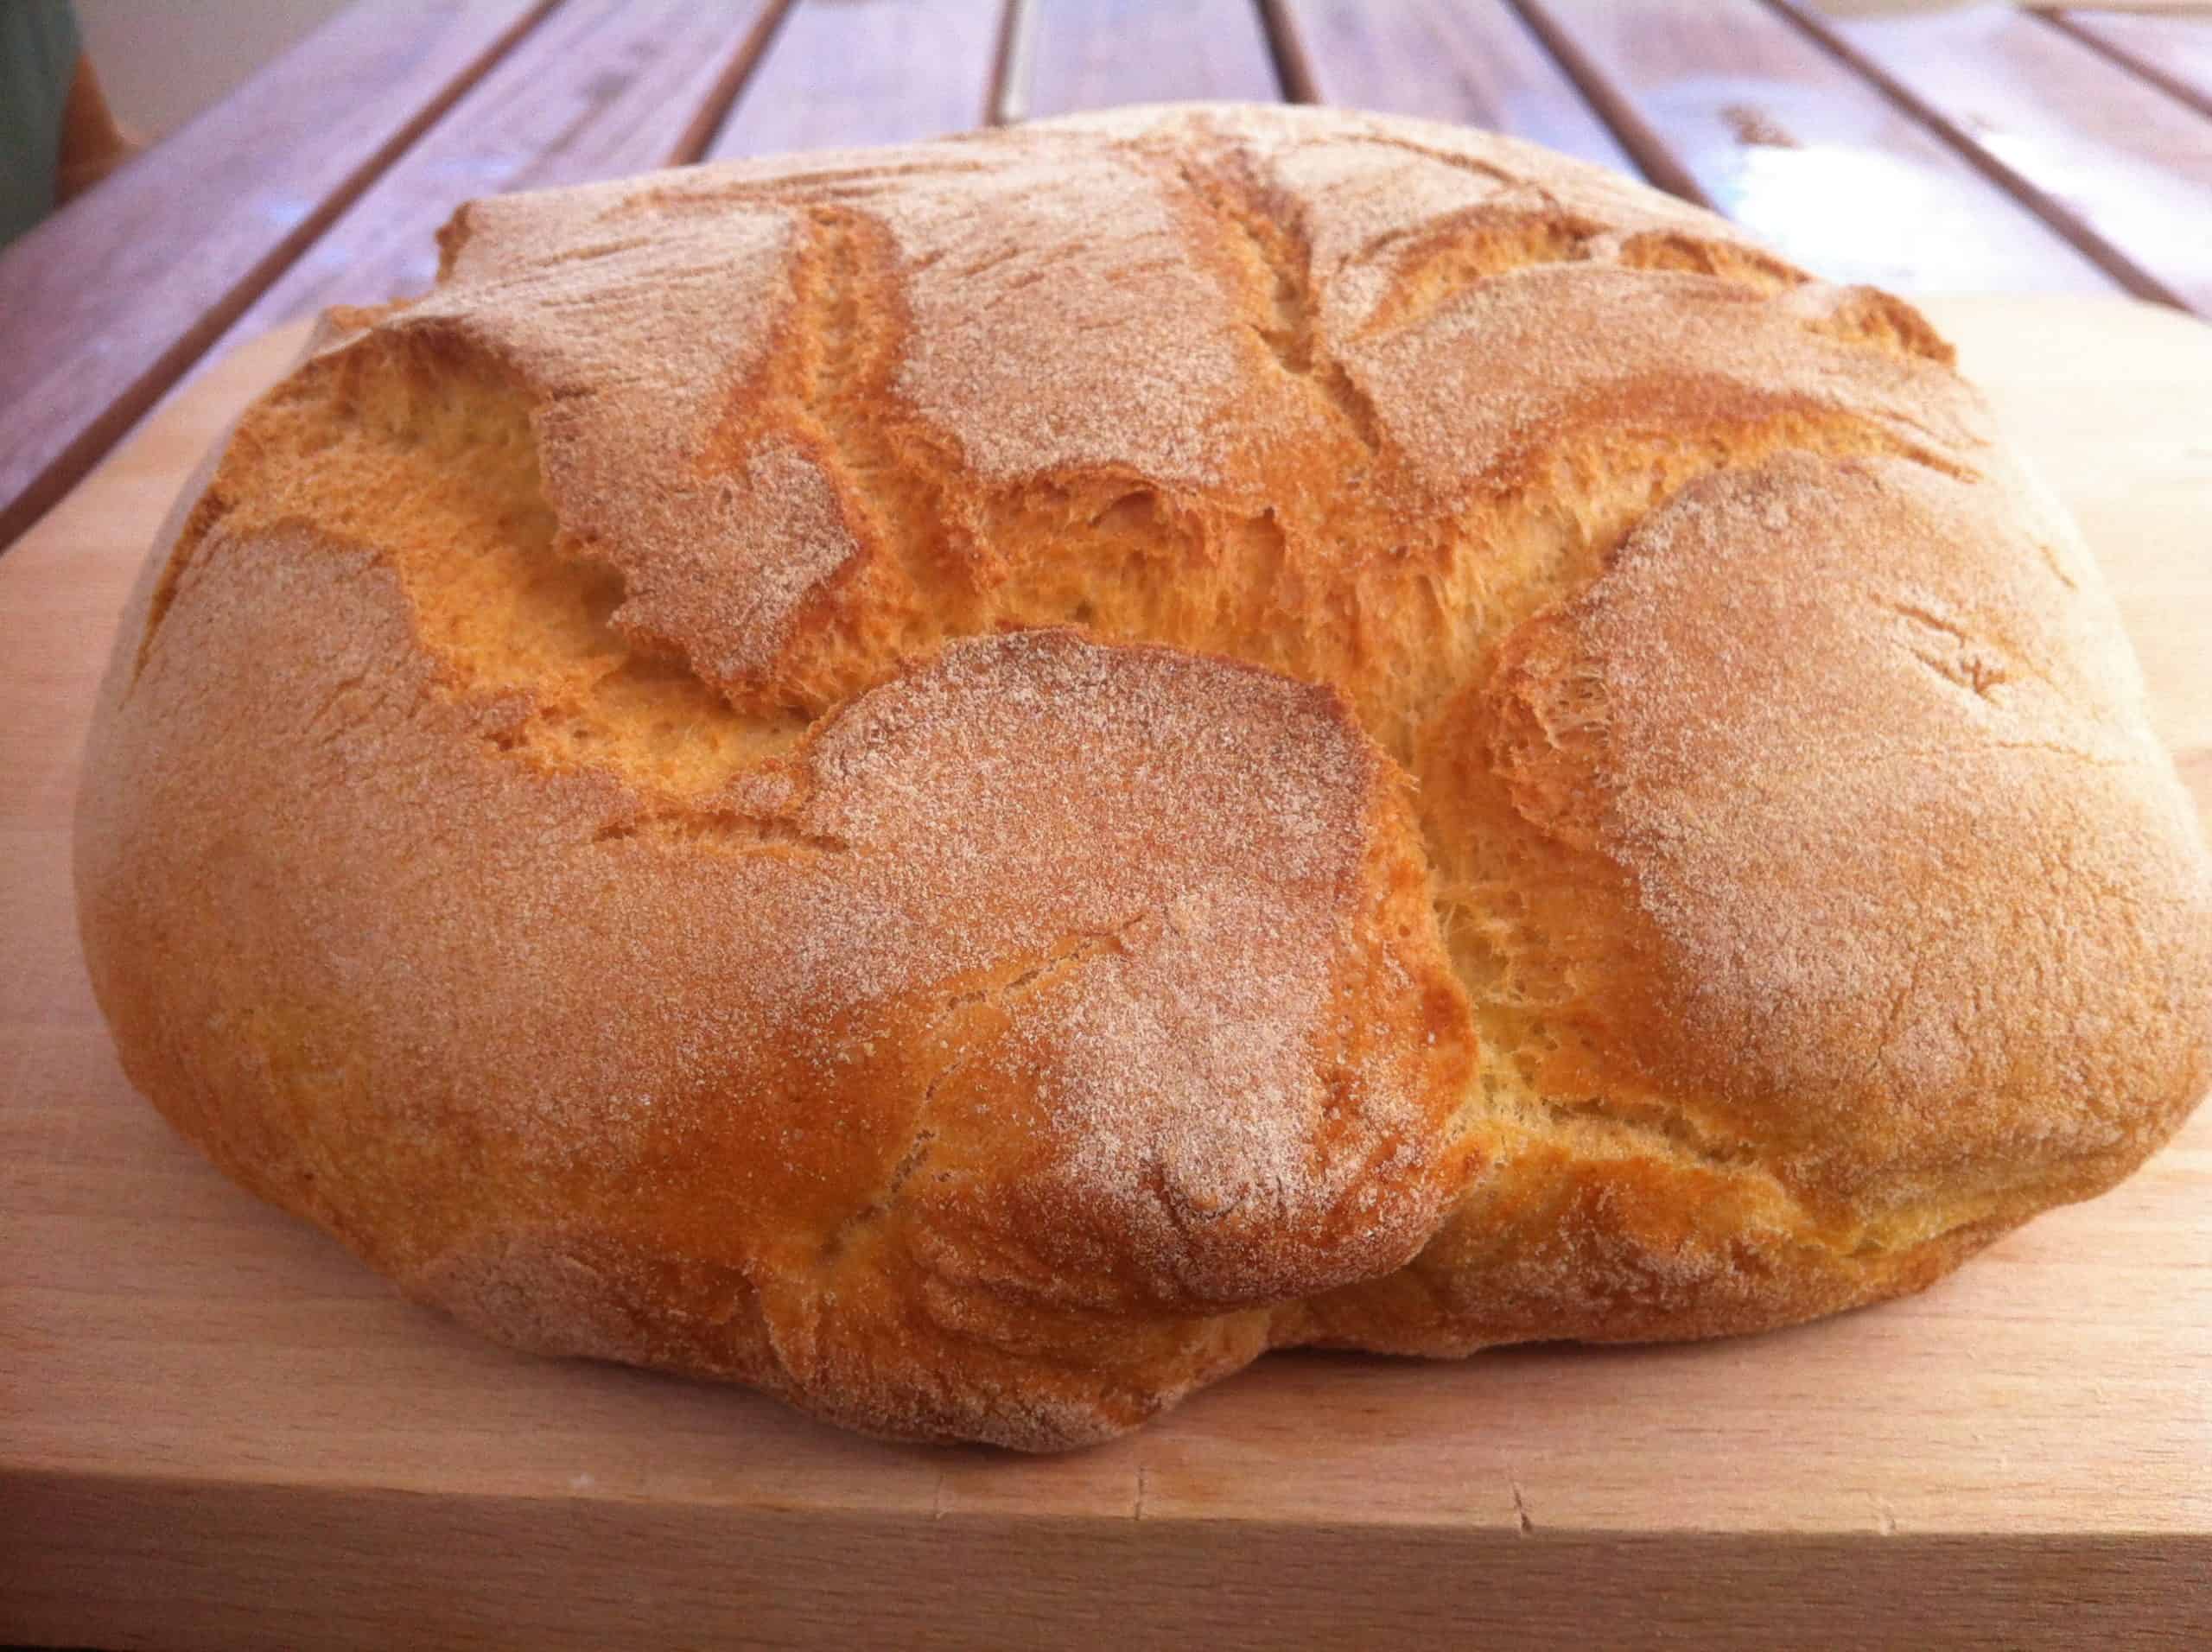
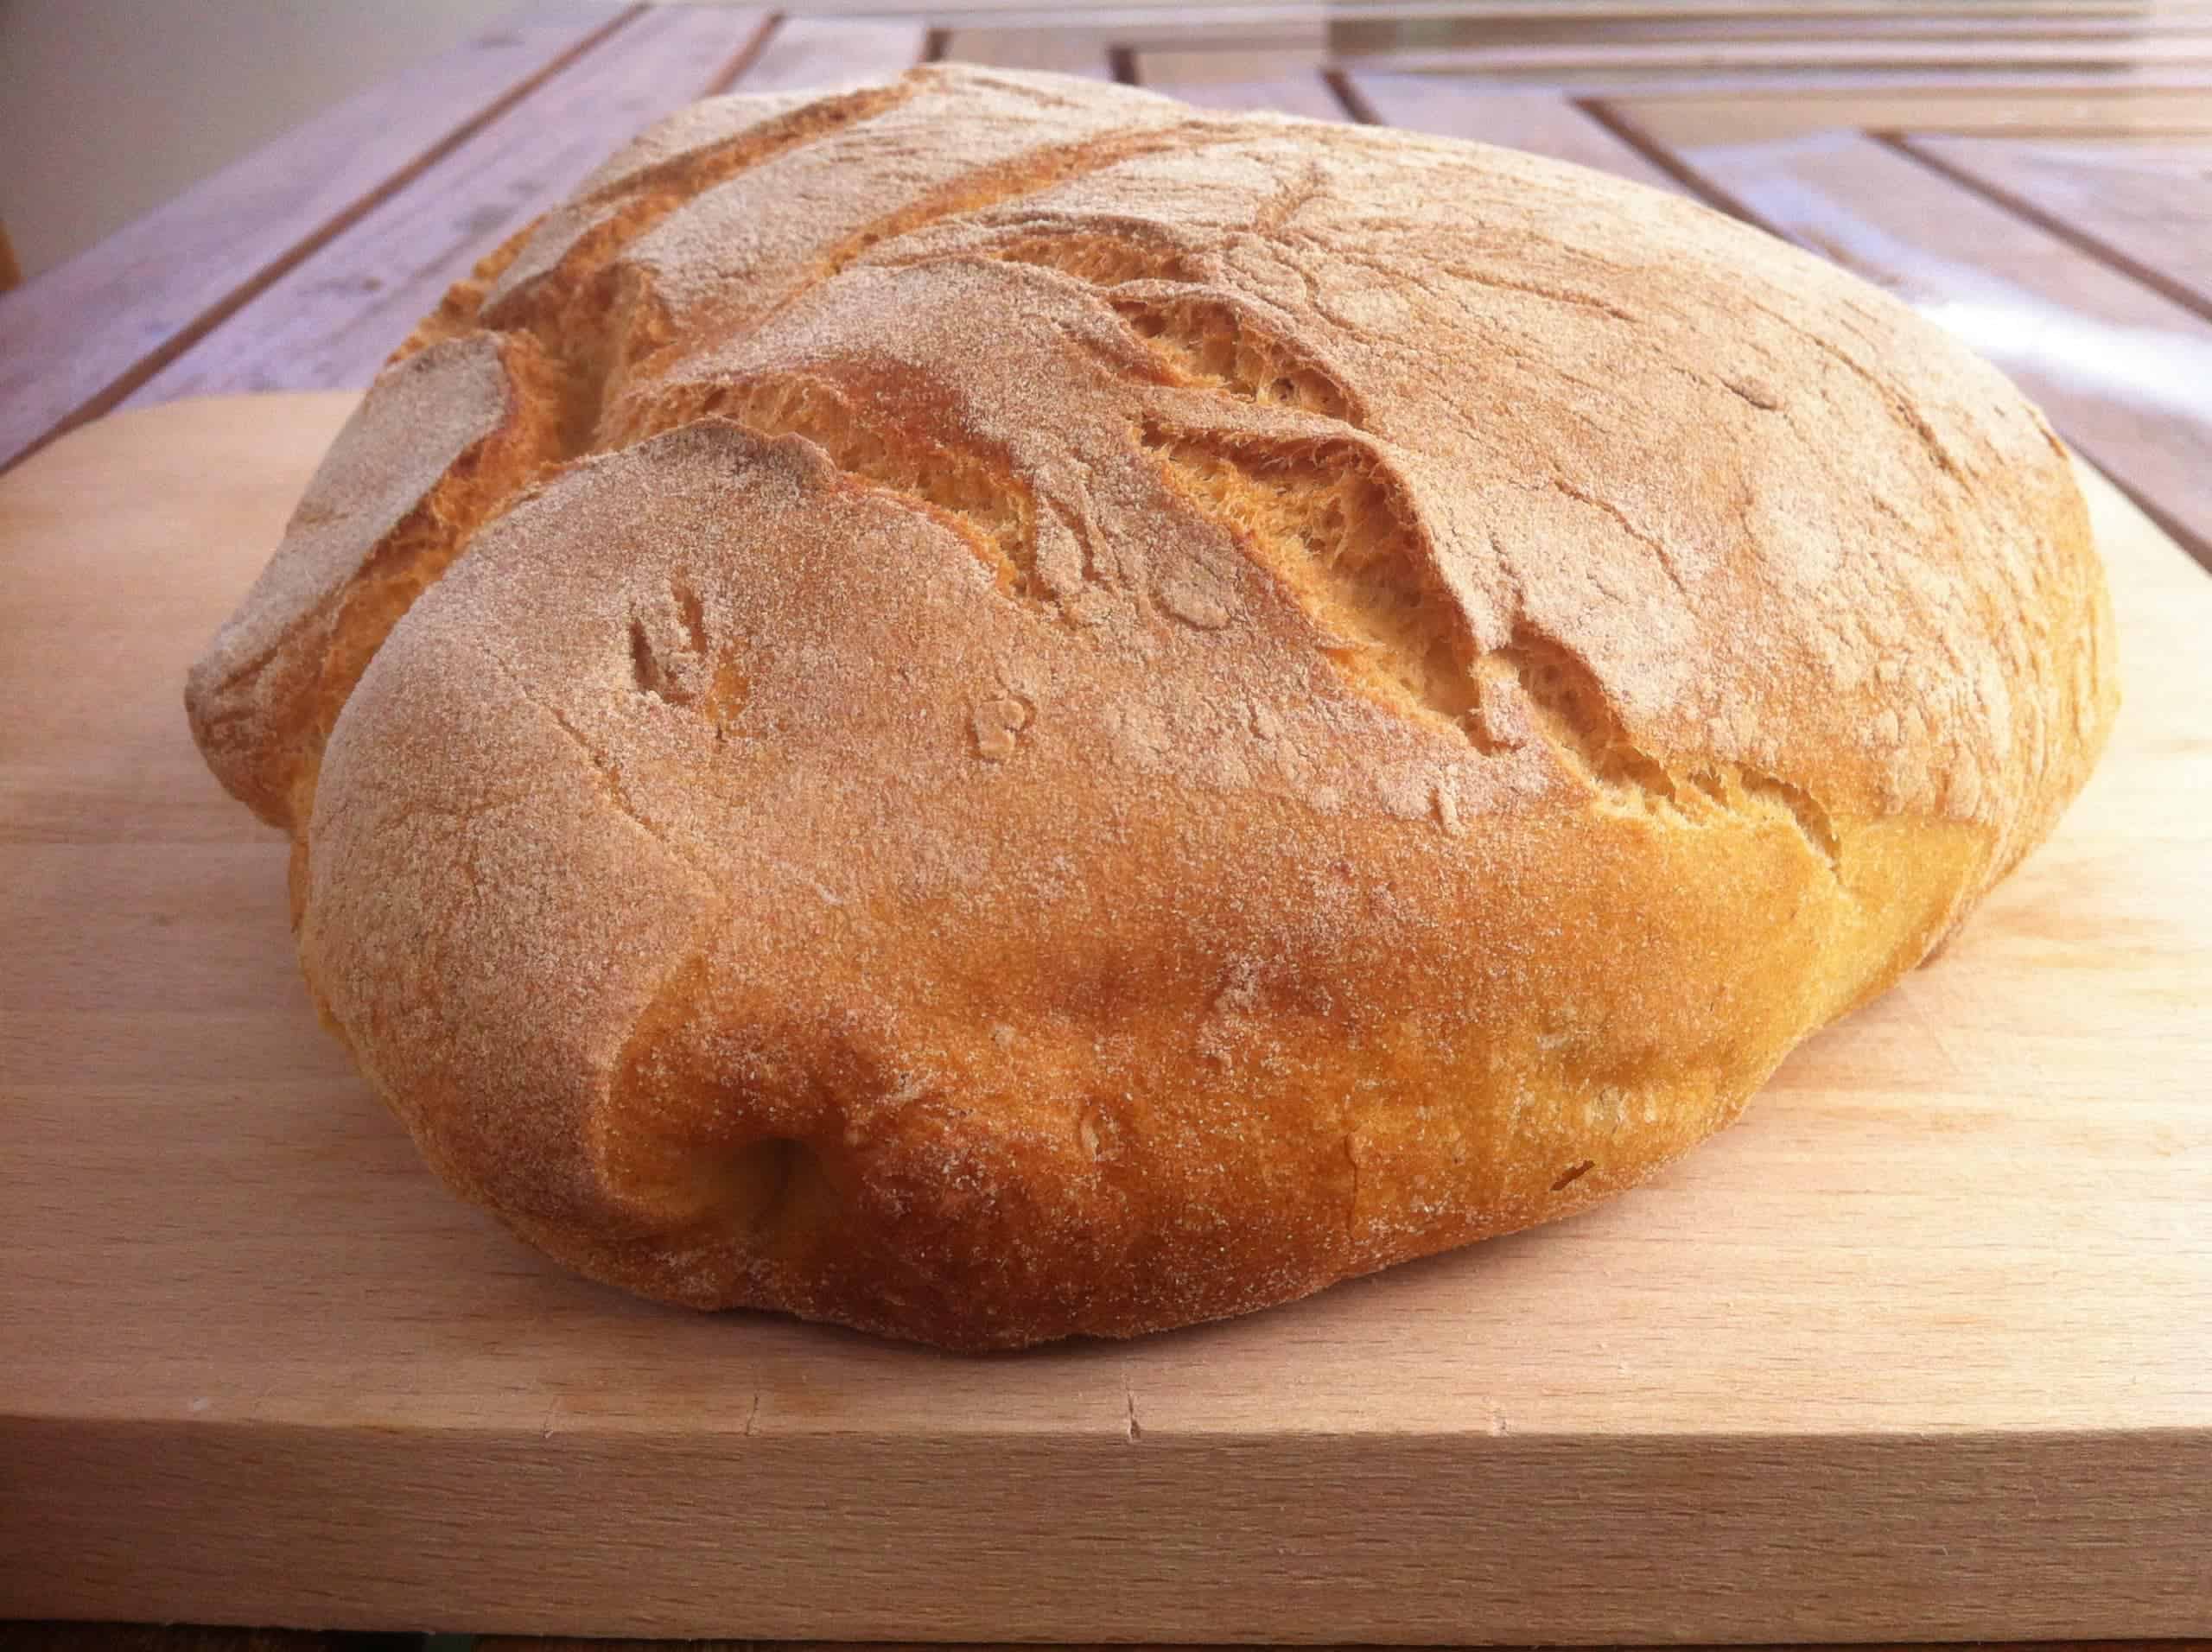
Sprinkle the bread loafs with some water and sieve with some flour. You can also sprinkle with some sesame seeds for some extra crunchiness.
With a sharp knife, score the top of each loaf. Make 3-4 slashes across the top with a few deeper than the others.
Layer the bottom of a baking tray with some greaseproof paper and place the loafs on top. Bake in the preheated oven at 200C (400F) with both top and bottom heating elements on or 180C (350F) fan and bake for 60-70 minutes, until a nicely coloured crust forms and is cooked throughout.
Oh that’s unlucky… In that case just bake with both top and bottom elements on, just move the bread around! Start by placing on the lower rack then move to the middle rack!
Wow your name jumped out. My name is Anne Elizabeth Davies. (Maiden name) my married name is Schrauger. Anyway, wow. My dad always said we were Welsh . How about you?
I love this recipe! Have shared with friends and family too.. made it about 4 times now and a win every time, it’s so easy, and absolutely delicious! I’ve added sunflower and chia seeds to the mix too..
Also today I put one half of the dough in a 1lb loaf tin as an experiment – it worked! Slightly better shape for sandwiches..
Question – if I wanted to just make one, bigger loaf, how would that effect the baking time? Or is it not recommended?
Hi Em, thank you for your kind words! if you’d like to make a bigger loaf, you’ll need to use a bigger tin and stretch it out a bit more. It shouldn’t take much longer to bake – probably add an extra 10 minutes, if that. Check the crust on top and when its nicely browned its done 🙂
Super quick & easy recepie thank you. However while my bread was nicely brown and Vert crispy on the outside it was very dense in texture and still a bit doughy on the inside. Where did I go wrong?
Your bread looks amazing, but your recipe states both self rising (US) and self raising (UK) flours. These are totally different mixtures, I learned this the hard way! Can you please tell me which one you used? Thanks!
We used European self raising flour, which as you pointed out does not contain salt. If you’re in the US a good solution would be to use plain four and add 2 teaspoons of baking powder to every cup of plain flour, then add the salt separately.
The US self rising flour already has salt in it, do I still need the salt the recipe calls for? I made one loaf already with the salt and the taste wasn’t quite right
If the flour already has salt in it then avoid adding any to the recipe. A better solution would be to use plain four and add 2 teaspoons of baking powder to every cup of plain flour, then add the salt separately.
Can wholemeal self-raising flour be used for this recipe? Might there be any necessary adjustments?
Thank you. Looking forward to trying this but I dont eat white flour.
Oops! Commented earlier on leavening, (Corriher) re: too much baking powder will cause deflation- The correct amount of baking powder is 1 1/4 tsp to one cup flour!
I wish I could send a pic of my bread from your recipe- it came out mammothly!
Thank you for being my 1st time using self rising flour. (US)
Uh, i did cheat a bit because i put chopped up olives in it! Lol!
It was lovely, and bread texture, great!
Jen
This is exactly the information I needed! I love this! I am looking for options that are lower on the glycemic index, and oat flour is perfect for that. Thanks for this!
1. Instead of making 2 loafs, I would like to make 4 (or 6) buns (round shape) out of it. How long do I need to bake these buns in a 180 degree C oven?
2. How much kneading do I need on those dough (bun)?
Over the past 8 years you have made My Greek Dish the number one destination for anyone searching for authentic Greek recipes! For that I cannot thank you enough!
It all started with an idea… To collate and publish all those recipes that I loved when I was young, the ones I made with so much love for my children and grand children!
So go ahead, explore my delicious collections and don’t forget to leave me a comment, connect with me on Facebook or Instagram and sign up to my mailing list so you never miss out on my latest creations!
")
")


")
")


i cannot turn one element on and off unless I use the lower over and then it is left or right not top and bottom anyway
Oh that’s unlucky… In that case just bake with both top and bottom elements on, just move the bread around! Start by placing on the lower rack then move to the middle rack!
I am wondering if this recipe would work with Gluten Free flour ?
thank you now I can make this and hopefully it will save me money
Wow your name jumped out. My name is Anne Elizabeth Davies. (Maiden name) my married name is Schrauger. Anyway, wow. My dad always said we were Welsh . How about you?
About to try this ……. The idea of quick bread is a ‘must’ try 🙂
Hi Simon, how did it go? Did you like it?
I am about to try this! This seems such an easy way of making bread when on board a small boat rocking in the waves. Cheap, easy and tasty… ?
can I mix dough in a bread machine
A fantastic recipe super easy and quick because no waiting time for dough to rise. Hubby loves the texture and taste. Thanks heaps 🙂
Thank you so much Leilah! So happy you loved it! Be safe 🙂
I love this recipe! Have shared with friends and family too.. made it about 4 times now and a win every time, it’s so easy, and absolutely delicious! I’ve added sunflower and chia seeds to the mix too..
Also today I put one half of the dough in a 1lb loaf tin as an experiment – it worked! Slightly better shape for sandwiches..
Question – if I wanted to just make one, bigger loaf, how would that effect the baking time? Or is it not recommended?
Hi Em, thank you for your kind words! if you’d like to make a bigger loaf, you’ll need to use a bigger tin and stretch it out a bit more. It shouldn’t take much longer to bake – probably add an extra 10 minutes, if that. Check the crust on top and when its nicely browned its done 🙂
I have a fan oven and not sure how to adapt this recipe
Hi Dina
Try at 180C if you can’t use the elements but only the fan..
Love
Eli
Hi there, 180c for fan oven but for how long please?
Can you replace the self raising with gluten free self raising?
Super quick & easy recepie thank you. However while my bread was nicely brown and Vert crispy on the outside it was very dense in texture and still a bit doughy on the inside. Where did I go wrong?
i will try,i am alway afraid that without yeast it might not rise.
i should then get back to you.,thanks
Just made the bread and it’s delicious. Could I freeze half the unbaked mix?
Your bread looks amazing, but your recipe states both self rising (US) and self raising (UK) flours. These are totally different mixtures, I learned this the hard way! Can you please tell me which one you used? Thanks!
Hi Debbie
We used European self raising flour, which as you pointed out does not contain salt. If you’re in the US a good solution would be to use plain four and add 2 teaspoons of baking powder to every cup of plain flour, then add the salt separately.
Best regards
Eli
hi please what is the 200c baking temp is it 350 or 400 degrees oven
Cathy
to convert Degrees centigrade to Fahrenheit multiply by 1.8 and then add 32 ie. 200C = 200×1.8 = 360 + 32 = 392F
The US self rising flour already has salt in it, do I still need the salt the recipe calls for? I made one loaf already with the salt and the taste wasn’t quite right
Hi Sherry
If the flour already has salt in it then avoid adding any to the recipe. A better solution would be to use plain four and add 2 teaspoons of baking powder to every cup of plain flour, then add the salt separately.
Best regards
Eli
Can wholemeal self-raising flour be used for this recipe? Might there be any necessary adjustments?
Thank you. Looking forward to trying this but I dont eat white flour.
Oops! Commented earlier on leavening, (Corriher) re: too much baking powder will cause deflation- The correct amount of baking powder is 1 1/4 tsp to one cup flour!
I wish I could send a pic of my bread from your recipe- it came out mammothly!
Thank you for being my 1st time using self rising flour. (US)
Uh, i did cheat a bit because i put chopped up olives in it! Lol!
It was lovely, and bread texture, great!
Jen
my oven only has one element, or the broiler
it’s a good thing I kept an eye on it, only took 40 minutes
Thanks I was gonna wing it!
Can we keep it in the freezer
Yes absolutely. You can slice and freeze or freeze whole. I personally slice it and freeze it as then I can defrost only the amount I need.
“Wow! At last I got a blog from where I be capable of actually get helpful facts
concerning my study and knowledge.”
Thank you Jinsily!
This is exactly the information I needed! I love this! I am looking for options that are lower on the glycemic index, and oat flour is perfect for that. Thanks for this!
Your welcome Soojan!
Hi Eli,
Couple of questions:
1. Instead of making 2 loafs, I would like to make 4 (or 6) buns (round shape) out of it. How long do I need to bake these buns in a 180 degree C oven?
2. How much kneading do I need on those dough (bun)?
Thanks
Have you a recipe for a malt loaf? A bread malt loaf, not a fruit loaf, only place I’ve found it is in Greggs (sometimes) and it’s lush!
I made this with self rising flour, 1 loaf, in a Dutch oven and it came out PERFECT!!! Thank you
Thank you for this great recipe, it’s very clever. Wondering if I could add an egg yolk to give it more flavour? Thx